
What is Gridding?
Gridding is a way to make your fabric look more like your pattern chart by dividing the fabric into 10×10 sections if fabric squares where one cross stitch fits in each fabric square – just like in your chart.
Why Grid Your Fabric for Cross Stitch?
With a grid on your fabric, it is much easier to do counted cross stitch without miscounting. If you’re a cross-country stitcher (like I am), you can easily find where the next section of the pattern starts without having to count one square at a time.
Let’s say you need to move 22 fabric squares to get to the next motif. You could count 1, 2, 3, 4 … But with gridding, you can count 10, 10, 1, 2 and you’re there!
And for any counted cross stitch project, you can more quickly look up from your stitching and find your place in the pattern.
There’s two main ways to grid your fabric for cross stitch: writing and weaving.
Follow along in this video or read below to learn how.
How to Grid Your Fabric for Cross Stitch
Grid by Using a Water Erasable Pen
If you are going to grid your fabric by writing on it, do not use a regular pen or pencil. The lead or ink will never come out of the fabric.
It’s best to use a water erasable pen, like this one. ➡️
The color of the ink should strongly contrast with the color of the fabric.
There’s another type of pen that is used to temporarily write on fabric called a friction pen. The ink is erased when the eraser is rubbed on the fabric, causing heat and friction.
A friction pen would be used in the same way as a water soluble pen. The only difference is removing the ink. In this example, I will use a water soluble pen.
- First, test the pen on a small sample of fabric. Follow the directions on the package to remove the ink. Make sure that it disappears entirely before trying on a larger piece of fabric.
- Then, find the center line. Using a ruler to keep the line straight, write over the holes on the fabric with the water soluble pen.
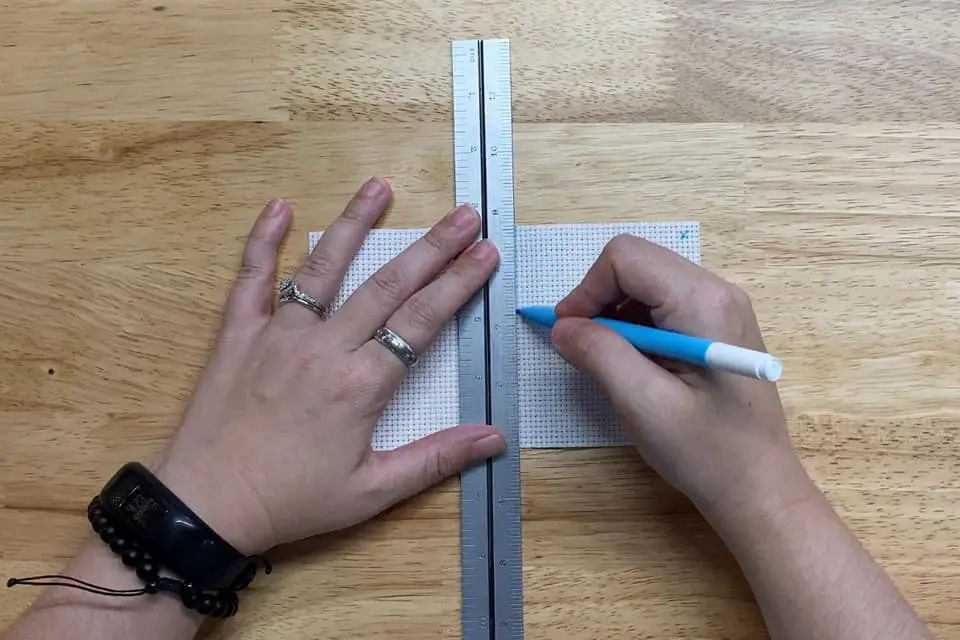
- Count 10 columns (count again!), and create the next line. Extend the lines to the edges of the cloth so you can still see the lines as you stitch for easy counting. Continue across the whole piece of fabric.
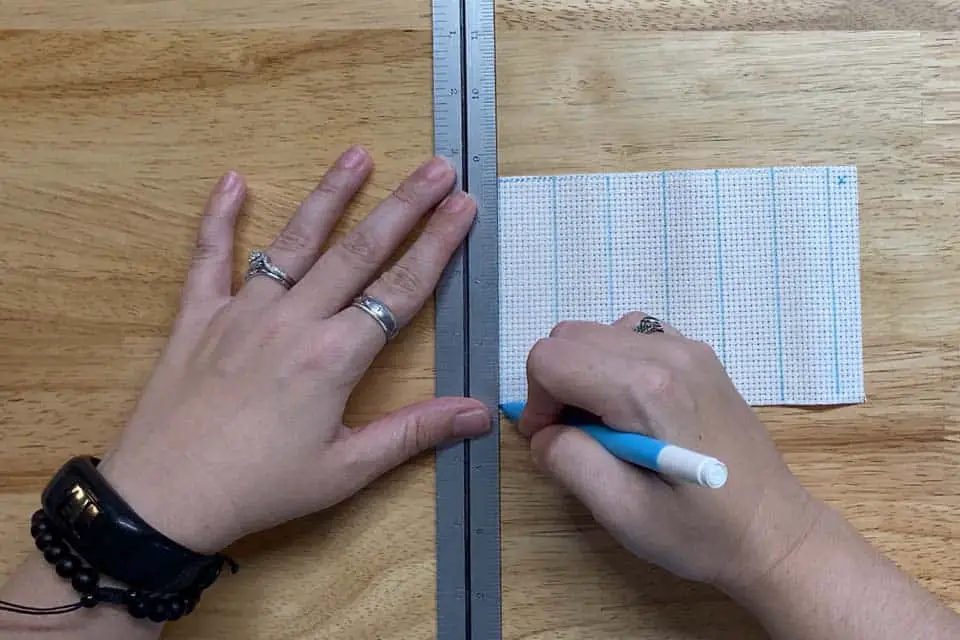
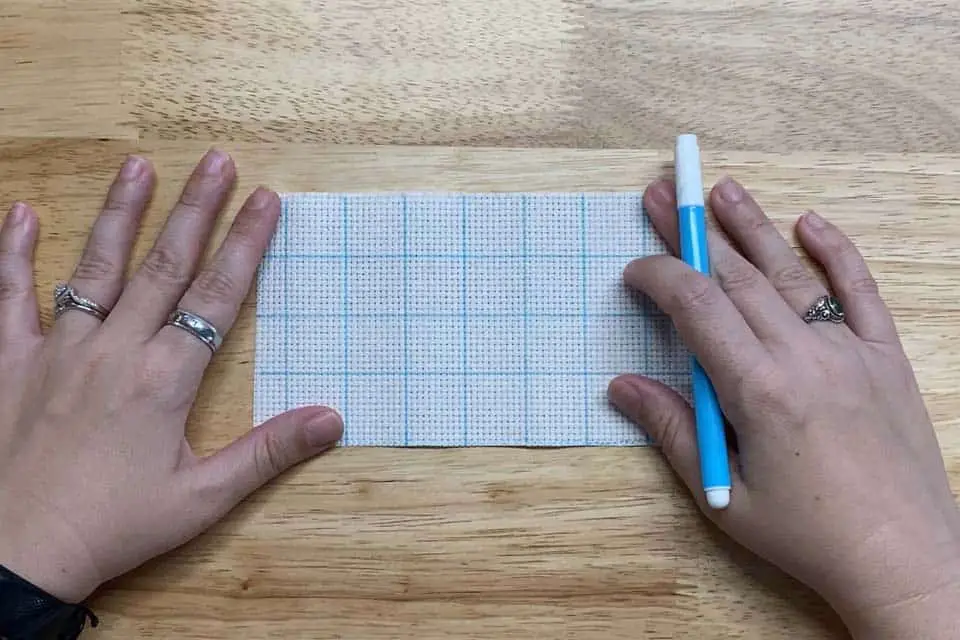
- Flip your fabric 90 degrees, start again in the center, and repeat by adding a grid line every 10 rows. You’re finished when the whole piece of cloth is covered in grid lines.
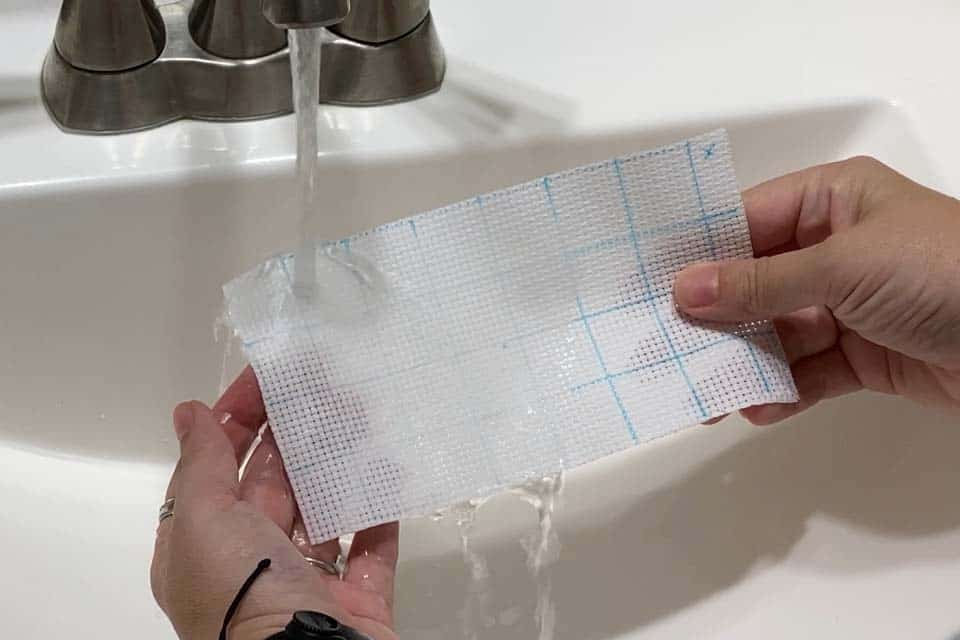
Remove Water Erasable Pen
Water erasable ink erases with just water! Follow the directions on the package of your pen or marker. You may need to soak the fabric for a period of time or use a gentle detergent to wash it out completely.
Pros and Cons for Water Erasable Pen
Pros
- Goes on Fast! You can grid a very large piece of cloth quickly so you can get to stitching right away.
- Easy to use. Just draw on and go.
- Can be used for other stitchy-related projects like drawing a design to embroider or creating cut-lines on a sewing project.
- Less Expensive initially. A single water erasable pen costs less than a single spool of guideline wire.
Cons
- If you make a mistake, you have to wash it out and start over. Or use a new piece of fabric.
- Takes more time to remove. After washing and drying the fabric, you may have to iron the wrinkles out.
- Need to test a small piece of your cloth first. It may not wash out of all fabrics.
- More expensive per project. A water erasable pen can only be used for so many projects before the ink runs out. The guideline can be re-used over and over across many projects.
Grid by Weaving Guideline Wire
When gridding by weaving, try to avoid using embroidery floss. If you accidentally pierce the floss with your needle, you can’t pull the floss out from under your stitches.
It’s best to use some type of thin wire. You can use fishing wire. But most fishing wire is transparent which makes it hard to see. Like the pen or marker, you need a wire in a color you can easily see against the color of your fabric.
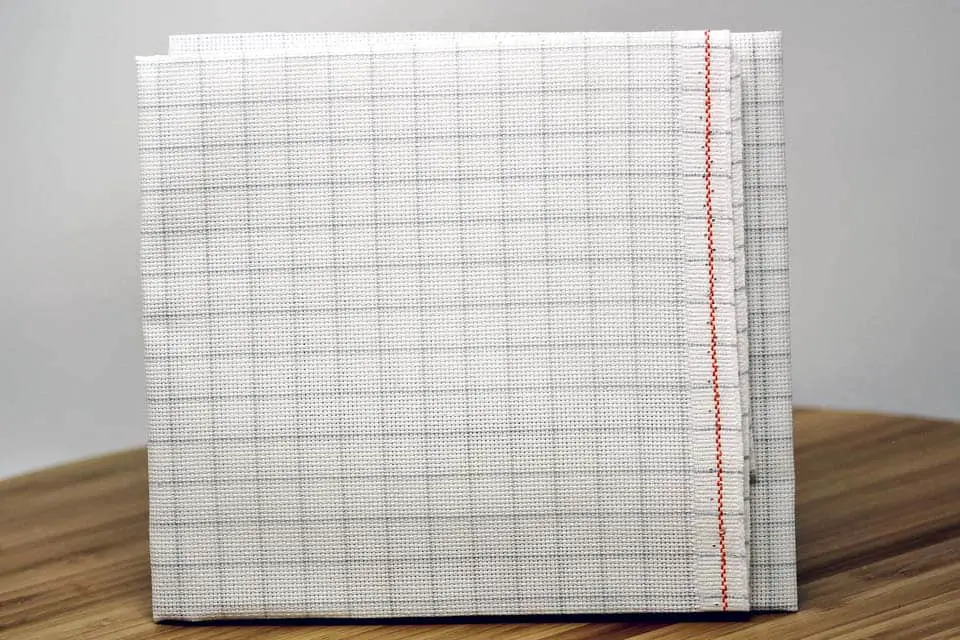
On my latest cross stitch project, I tried a product called Easy Count Guideline. It’s basically a really thin gauge of bright red fishing wire.
It comes with easy-to-follow instructions. But you can use it how you want.
Here’s how I used it.
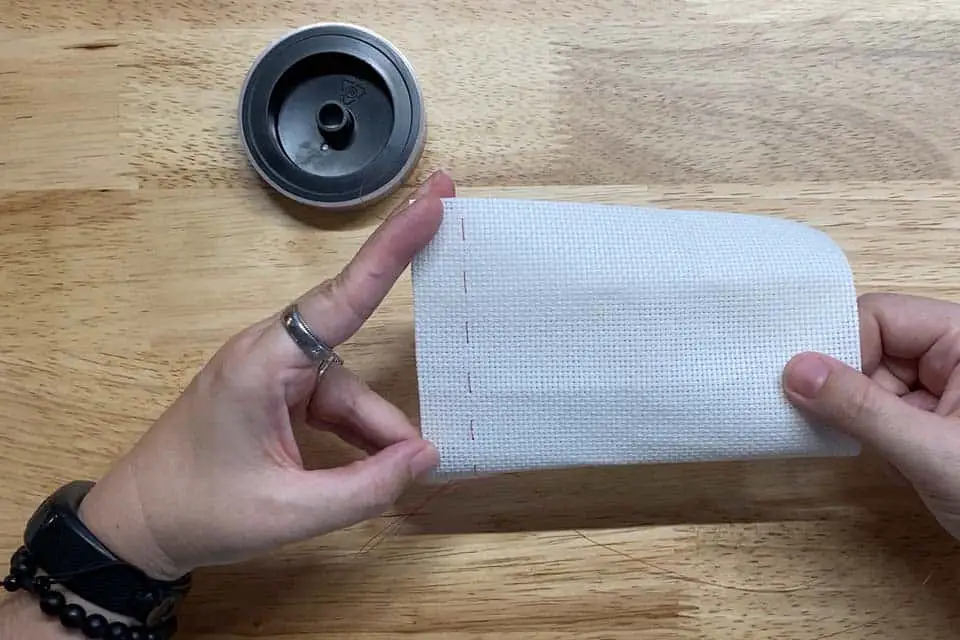
- Thread the Easy Count Guidline through the eye of your needle without cutting it.
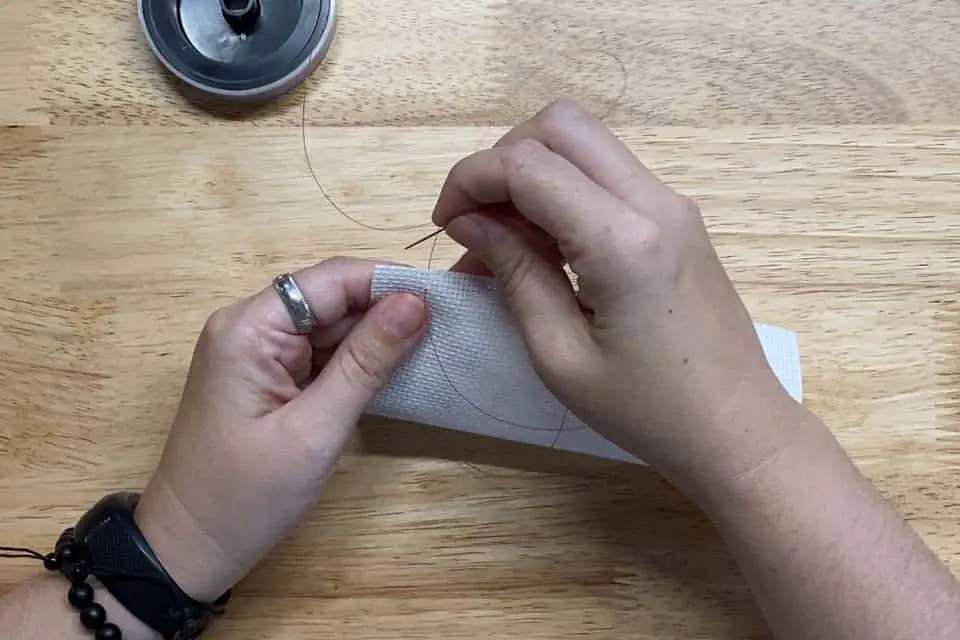
- Count 10 columns from the left and 4 rows down, then pull the guideline through from back to front
- Count 4 squares down and pull the Guideline through from front to back
- Count 6 more stitches down and pull the Easy Count Guideline through from back to front.
- Continue weaving the guideline 4 on top and 6 underneath all the way down to the bottom of the cloth
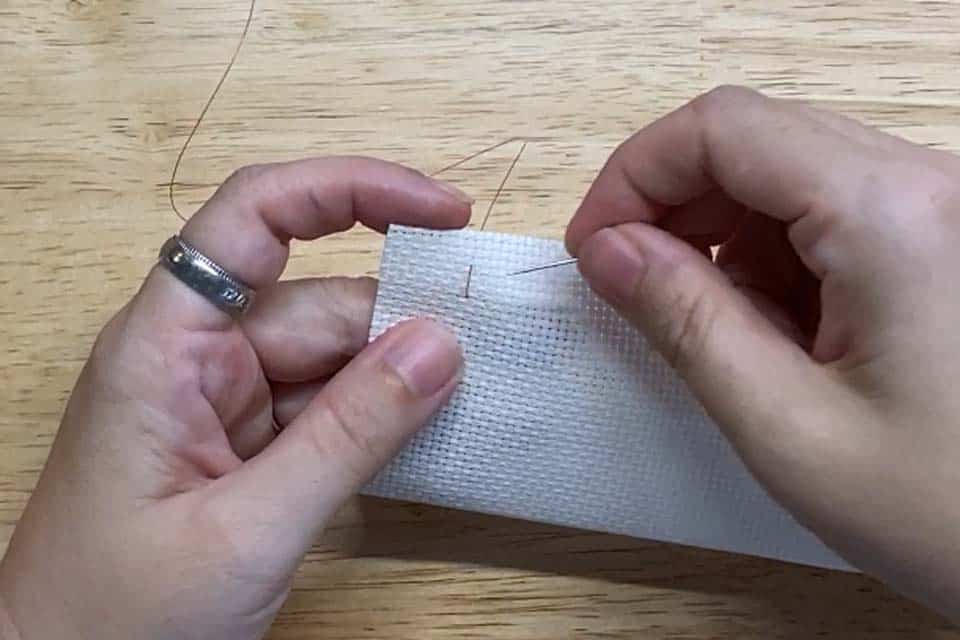
- Pull more guideline off of the spool and slide it through the stitches
- Don’t cut the wire. Count 10 columns to the right and start weaving the guideline through: 4 on top, 6 underneath, etc
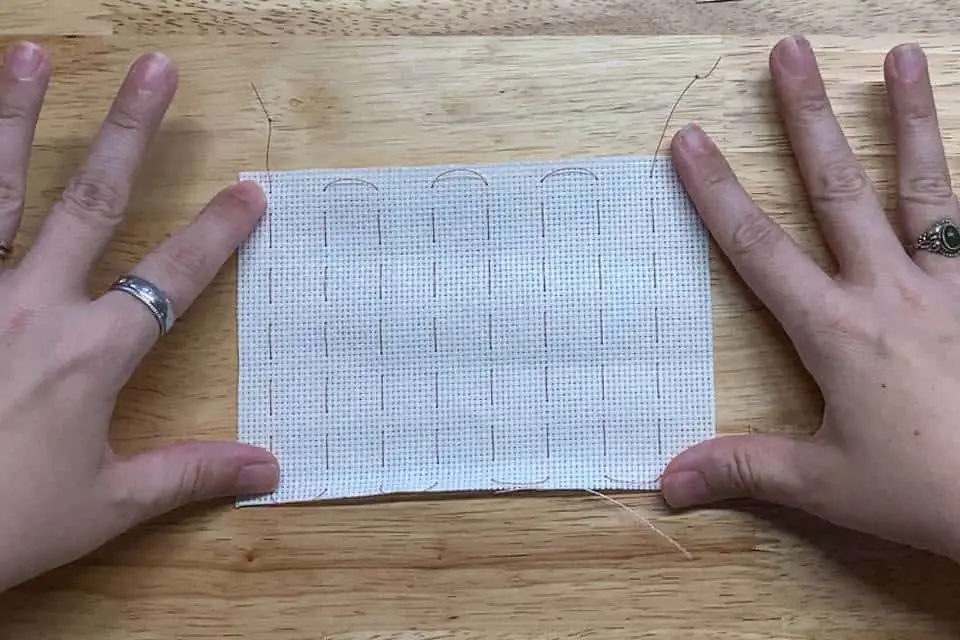
- Continue to the end of the fabric until all columns are gridded
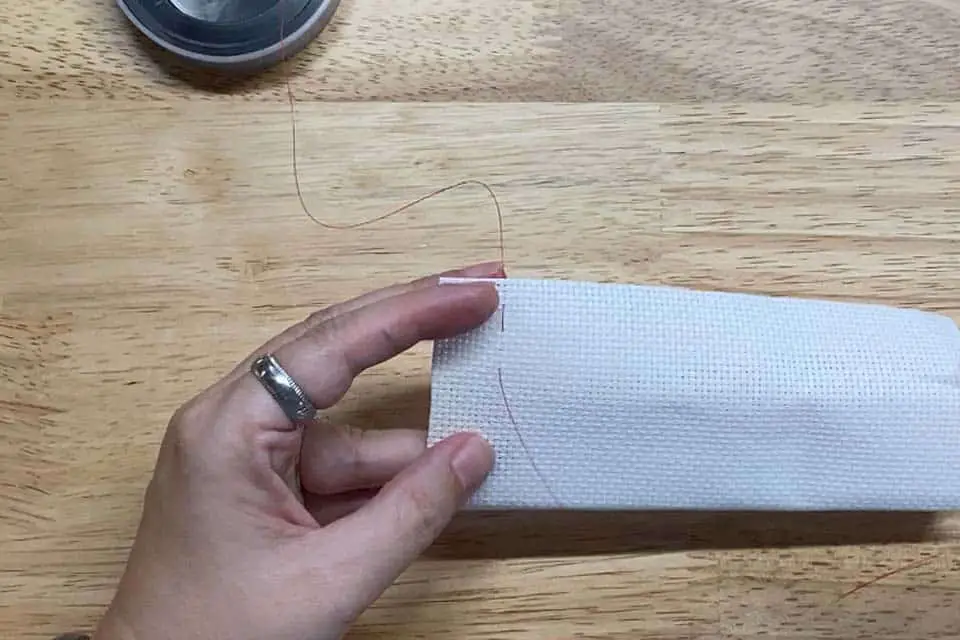
- Cut the wire and tie a firm knot at both ends of the wire. (It’s slippery stuff, so I triple-knotted)
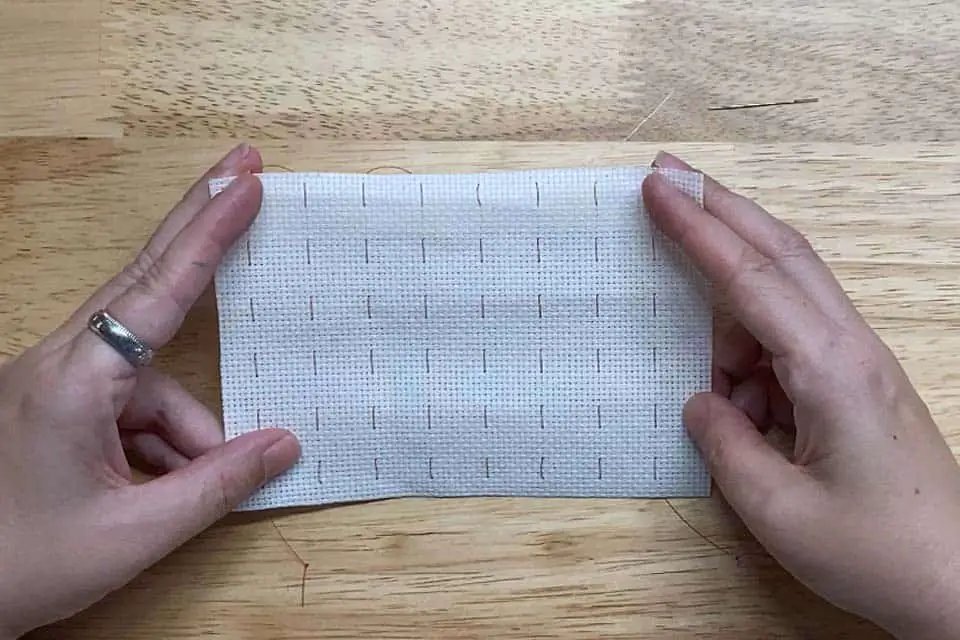
- Turn your fabric 90 degrees and repeat, gridding the rows
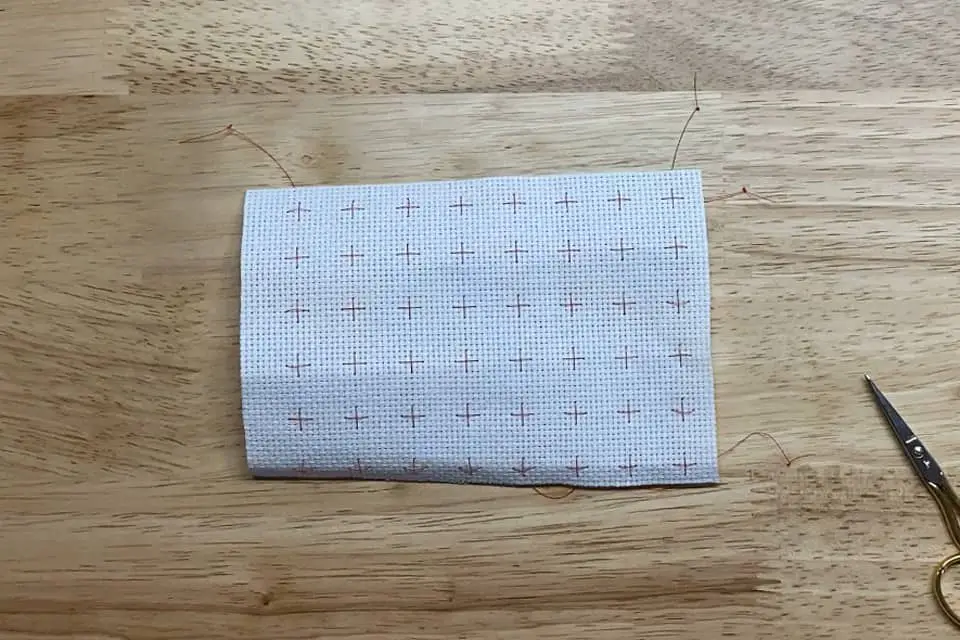
- When gridding the rows, the wire on top (4 on top) should cover the 4 on top from the columns, forming + signs
- These little + signs make the grid on the cloth look like the grid on the pattern chart
Try not to tug on the wire when moving your embroidery hoop or embroidery frame. This can form larger holes in the fabric. The holes will shrink back into place after washing and ironing the cloth. But part of the benefit of using the wire is that you don’t have to wash your fabric if you don’t want to.
Remove the Easy Count Guideline
Cut any knots off of the ends of the wire. Then pull gently, and the guideline will slip out from under your sitches.

Pros and Cons for Using Wire to Grid
Pros
- Clean – no accidental pen marks
- No need to wash fabric to remove the wire
- Quick removal – it slips right out!
- If you use long strands weaving the rows and columns without cutting the wire, you can use it over and over again on future projects.
- Less expensive per project. While the initial purchase of the wire costs more, it can be re-used indefinitely.
Cons
- Longer set-up. It took me about 30 minutes to grid a 5×8 strip of 14ct aida cloth
- More expensive. At the time of this writing, a spool of Easy Count Guideline was more than a single water erasable pen.
Should You Use Pen or Wire?
Use the pen for:
- Small, short-term projects
- Larger stitches
Use the wire for:
- Big, long-term projects
- Smaller stitches
"Cheat" with Pre-Gridded Fabric
Some aida cloth or evenweave fabric can be purchased pre-gridded. While you don’t have to grid it yourself – which can be a huge time-saver, you do still have to wash out the gridlines.
Pre-gridded fabric can be really convenient if you want to get stitching on a large project right away with the security of a grid to avoid miscounts. It is a bit more expensive than regular fabrics and comes in limited colors and counts.
Some cross stitchers always grid as a way to prevent miscounting or saving time. If that’s your jam, tell me about it!

")


2 Responses
Good article! I rarely grid my fabric, but I would try using the wire. Do you have a link to that?
I have a question, is there a reason for doing it 4 on one side and 6 on the other? Why not do it 5 and 5? Just curious.
Is it because it makes it easier to tell which is the right and which is the wrong side when you pick up your work maybe? I don’t have that problem…. the wrong side is messier… LOL
I’m so glad you found it helpful!
How ever many fabric squares you use the wire to cover the front v. the back is a personal choice. I prefer fewer on front, and I like to see where the gridelines cross because it’s easier for my eyes for find my place. I’ve also seen 8 on top and 2 on bottom, where all of the line crossings happen on the back. I bet if you try it a couple of different ways, you’ll discover what works best for you.
The picture of the Easy County Guideline is an affiliate link to where you can purchase it on Amazon. Here it is for convenience: https://amzn.to/2DxmjLb
You don’t have to use my affiliate link or Amazon. Just search for Easy Count Guideline and most online and in-person craft stores carry it. You could probably find a different type of thin wire to use, just don’t use floss or thread. If your needle pierces floss or thread gridlines, you’ll never get it out from under your stitches and it becomes a pain in the ass!
Happy Stitching!