What is an embroidery hoop?
An embroidery hoop is made up of an inner ring and an outer ring into which fabric is placed in order to keep it taut for hand embroidery. Embroidery hoops are excellent, reusable tools that keep your fabric taut and your stitching even. They also make convenient and pretty frames for your finished cross stitch projects.
Here you’ll learn all about the different types, materials and shapes that embroidery hoops come in. You’ll also learn when, how and why to use an embroidery hoop for cross stitch, and which hoops are best for different kinds of projects. Plus, tips and hacks on how to use embroidery hoops for your next cross stitch project.
Quick Links to Helpful Info in This Article
Part 1 – Embroidery Hoop Types, Materials, Shapes and Functions
- Do you need an embroidery hoop to cross stitch?
- When should you use an embroidery hoop?
- 4 Types of Embroidery Hoops
- Wood v. Plastic v. Metal Embroidery Hoops
- Embroidery Hoop Shapes
- Which type of embroidery hoop should I use?
- How big should my embroidery hoop be?
- How much does an embroidery hoop cost?
- Where can I buy embroidery hoops?
- How do I know if I should use an embroidery hoop?
Part 1: Embroidery Hoop Types, Materials, Shapes and Functions
Watch the Embroidery Hoop Basics Part 1 Video Tutorial
Do you need an embroidery hoop to cross stitch?
You do not absolutely need to use an embroidery hoop for cross stitch. You can cross stitch without an embroidery hoop.
I recommend using embroidery hoops for cross stitch beginners because they make it easier to keep the tension of your stitches even. They are lightweight and portable, helping you take your new cross stitch hobby anywhere. Like many things in cross stitch, it is a matter of personal preference.
Click here to see must-have tools and supplies for cross stitch beginners.
When should you use an embroidery hoop?
Embroidery hoops have two basic functions: to help you stitch and to display your finished projects.
Using an embroidery hoop to help you stitch is a good idea for beginner stitchers because it keeps the fabric taut, making it easier to stitch on. Taut fabric enables you to make even stitches and prevents the fabric from puckering under uneven stitches.
You should use an embroidery hoop if your hand cramps when you stitch in-hand, i.e. just holding the fabric. An embroidery hoop can make it more comfortable to hold the fabric, so you can stitch longer.
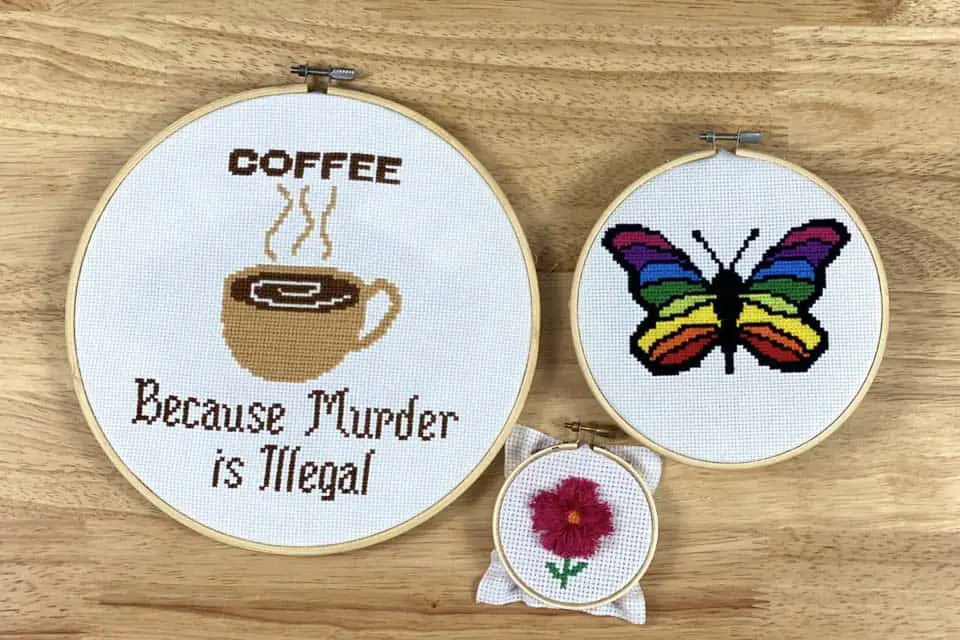
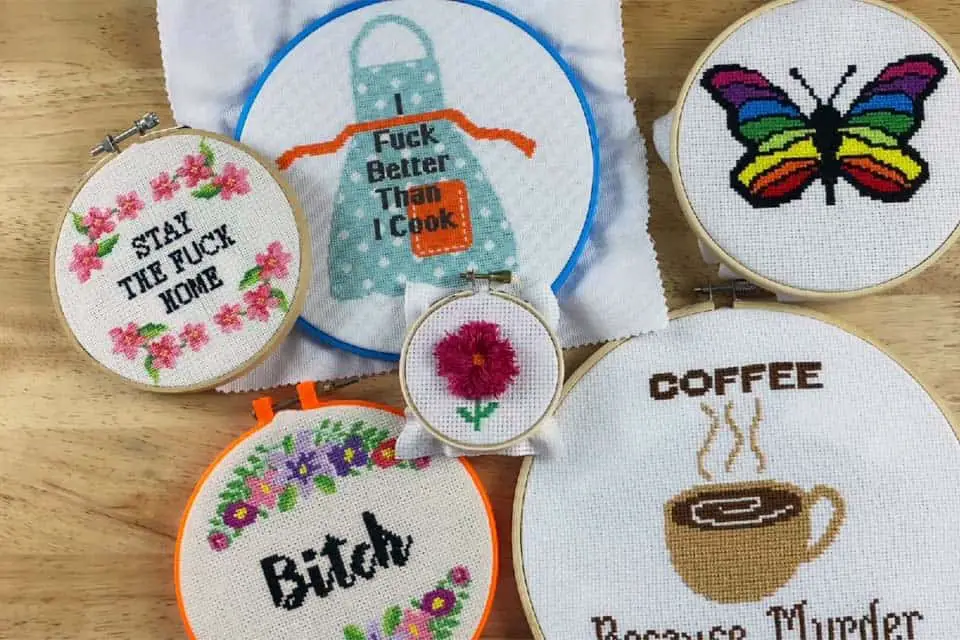
Embroidery hoops are also a great way to frame your finished cross stitch projects. A hoop can give your project a traditional look and feel. Or you can decorate your hoops or purchase specialty hoops to embellish your finished embroidery.
Click here to try my crazy easy hoop finishing ideas (with videos)!
A good time to avoid using an embroidery hoop is for very, very large projects. It can be cumbersome to try to gather up the extra fabric around the hoop when you are stitching in one section of a huge cross stitch pattern. In this case, a scroll frame will work better.
4 Types of Embroidery Hoops
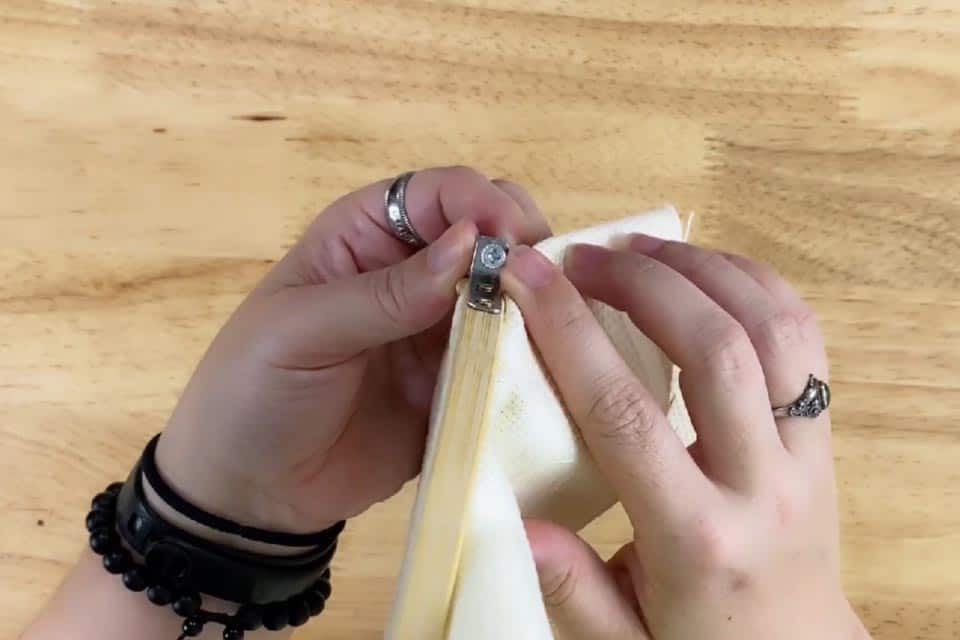
1. Screw Tension Embroidery Hoop
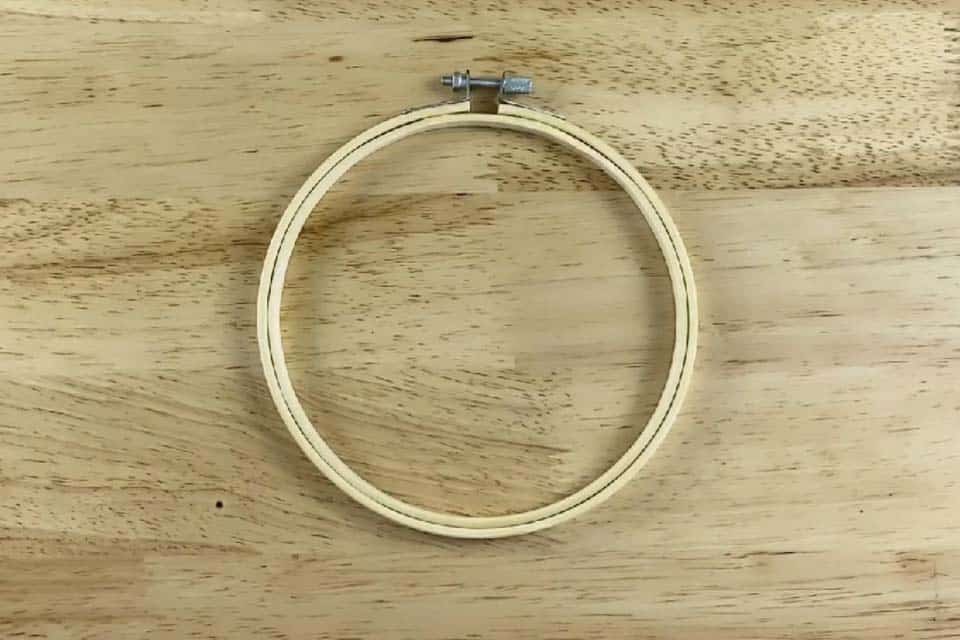
This is the most common type of embroidery hoop. A screw tension embroidery hoop consists of an inner ring, an outer ring and a screw mechanism. You tighten or loosen the tension by twisting the screw with your fingers or using a screwdriver.
Screw tension hoops are available in many sizes, shapes and materials.
Screw tension hoops are easy to find, easy to use and the wooden, circular hoops are inexpensive. These are used the most during stitching and sometimes for framing finished cross stitch.
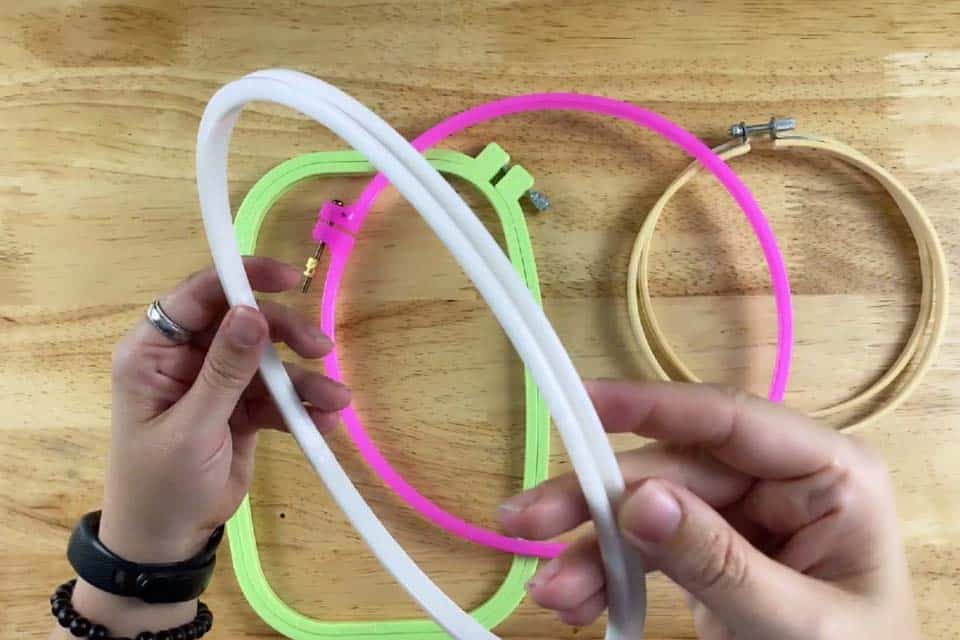
2. Flexi Hoop
Enjoying This Tutorial?
Become a VIP and get instant access to free patterns, plus future tutorials and stitchy inspiration delivered to your inbox.
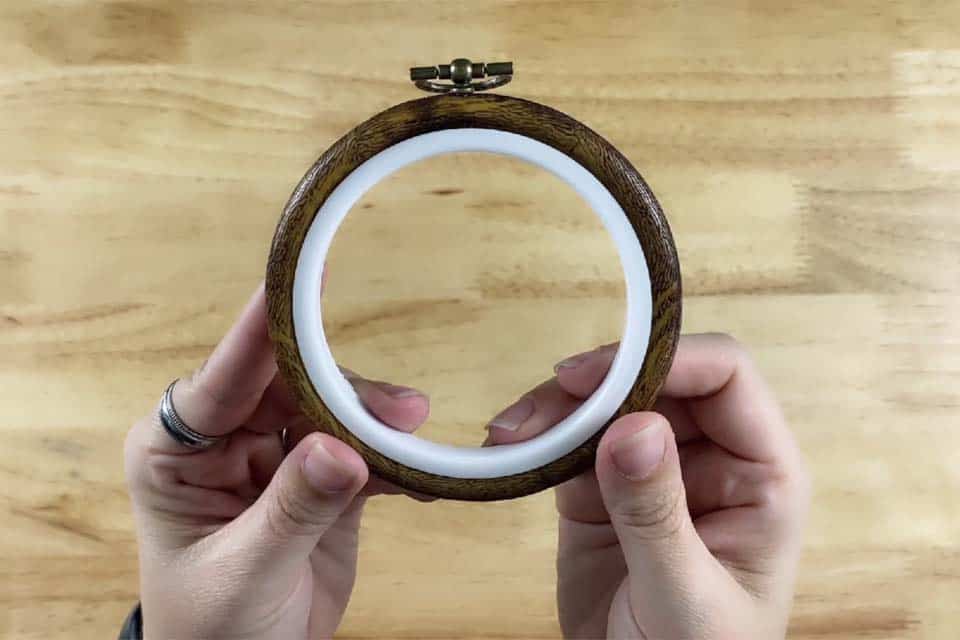
A flexi hoop is made up of an outer vinyl ring that fits very tightly over an inner ring made of hard plastic, plus a hanger. The outer ring slides and stretches around the inner ring and holds the fabric very taut. This sliding action can be a challenge to work with, and I often need to remove my fabric from the flexi hoop and try again to get it placed the way I want.
Flexi hoops are available mostly in a faux wood pattern, and come in the most unique shapes.
Flexi hoops are great for framing your finished project. But because it can be challenging to get the fabric in the hoop, I don’t recommend using them for stitching.
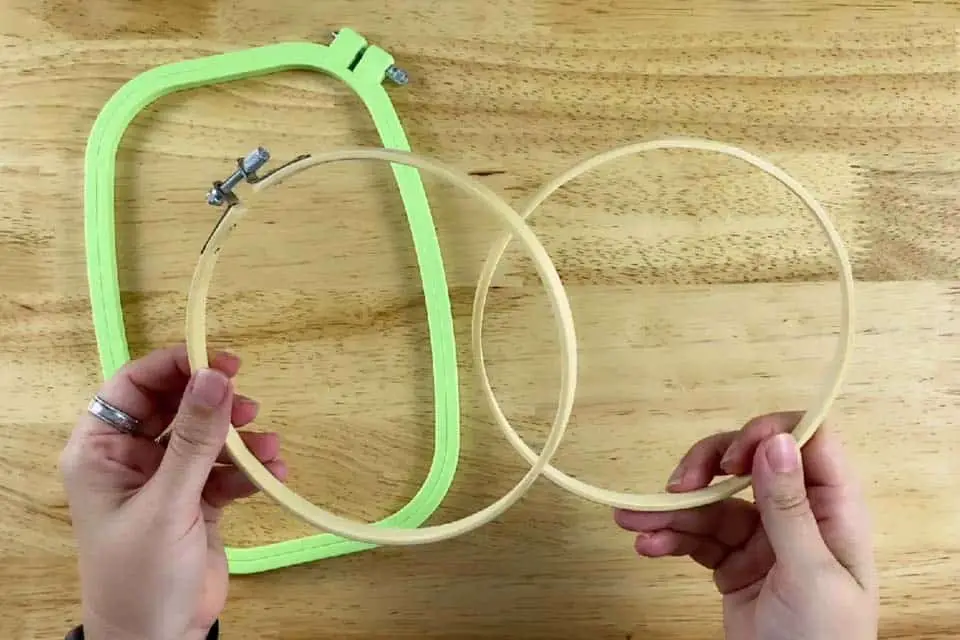
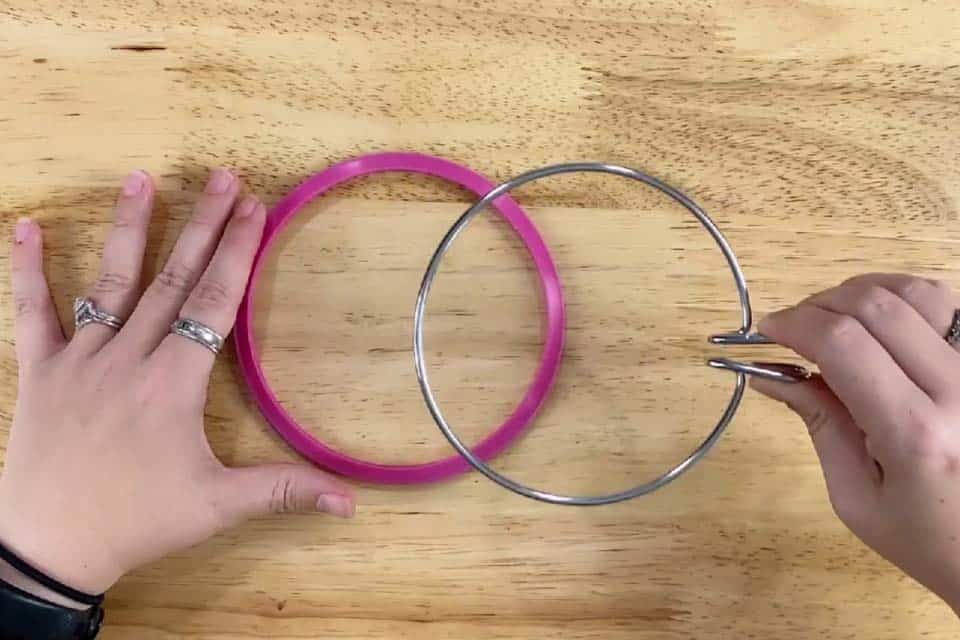
3. Spring Tension Embroidery Hoop
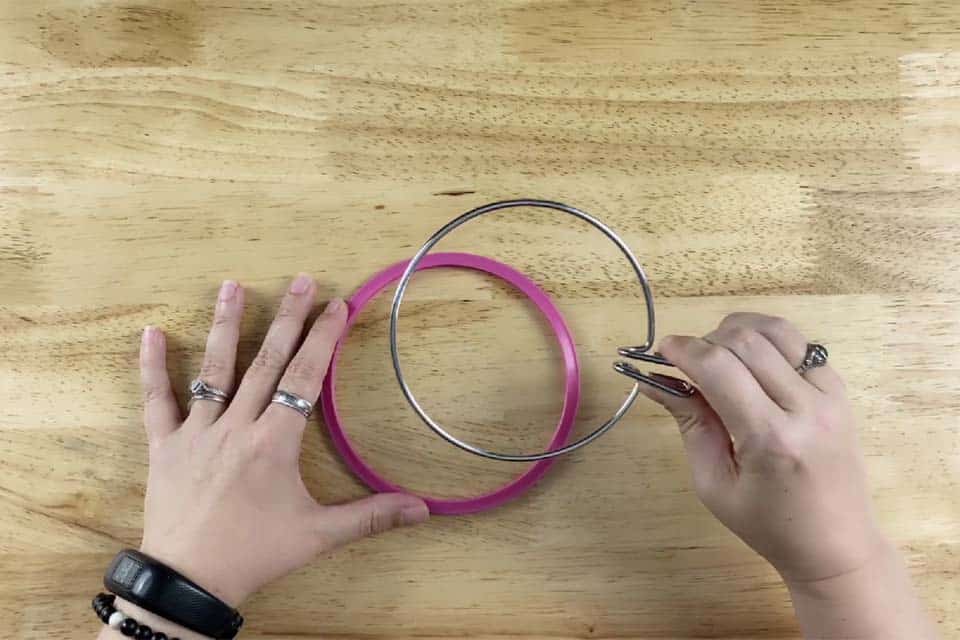
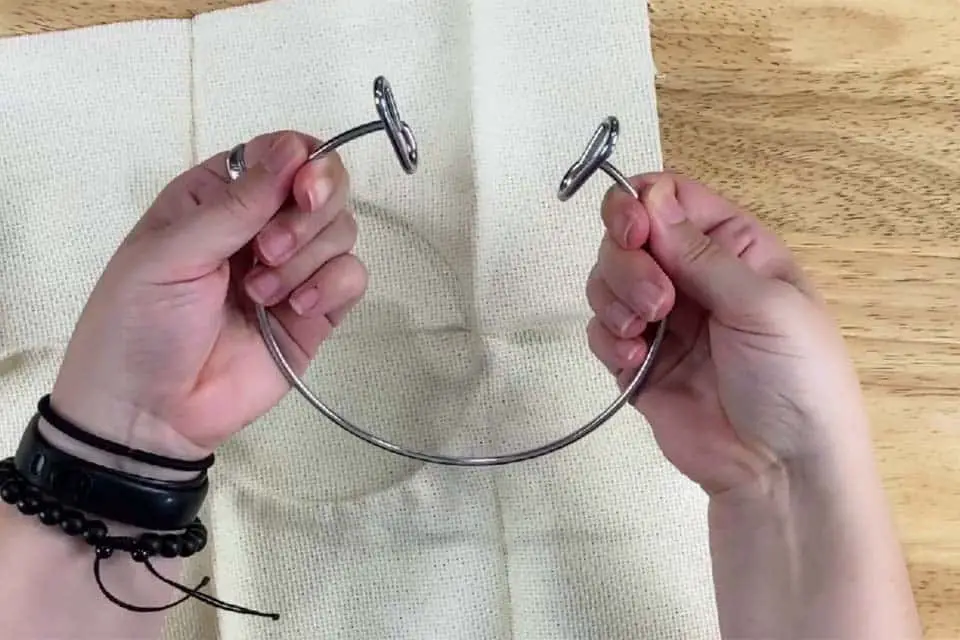
Spring tension hoops create tension with a metal inner ring that fits into the slot of a plastic outer ring. You squeeze the metal handles to make the inner ring smaller, then carefully place it into the outer ring.
Spring tension embroidery hoops are always round because the shape contributes to creating tension.
The smaller spring tension hoops hold the fabric very taut. However the larger hoops seem a bit more loose.
I don’t recommend spring tension hoops for hand embroidery.
4. Q-Snap
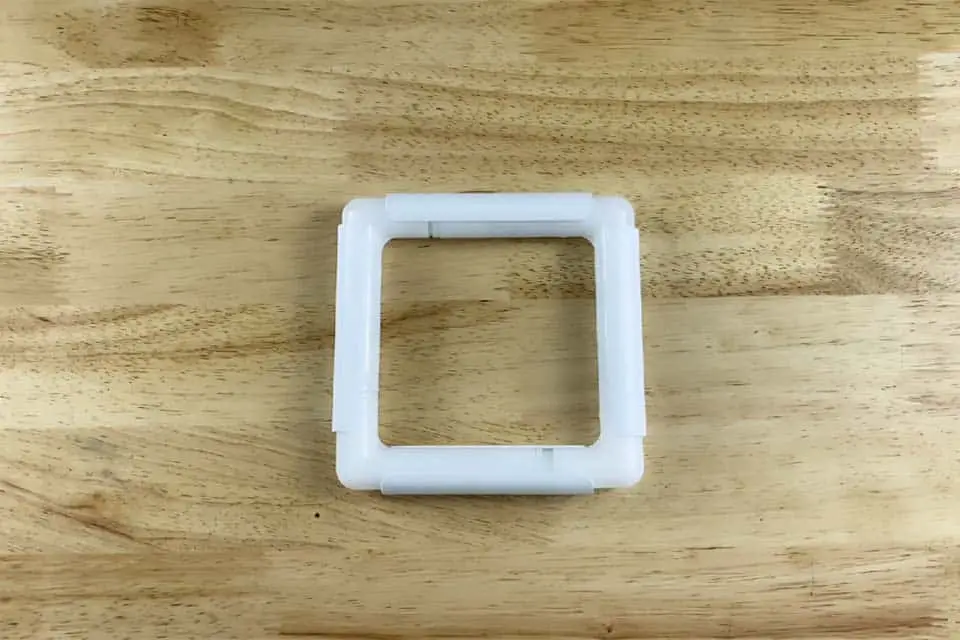
The newest type of embroidery “hoop” is the Q-Snap. They are made of thick, plastic pipes that fit together at right angles. Each side of the square or rectangle has a plastic clip that snaps on. The ridges on the inside of the plastic clips hold onto the fabric.
Q-Snaps come in many different sizes to mix and match. They can be square or rectangular in shape.
These are good to use if you have trouble gripping a regular embroidery hoop because the Q-Snap frame is thicker and easier to hold on to. They are heavier than traditional embroidery hoops. If that is a concern for you, you will want one of the accessories.
Q-Snap frames have some add-ons available. There are extension kits to make your Q-Snap frame larger. You can also purchase lap stands, table stands or floor stands for your Q-Snap. Some stitchers (and their partners) have made their own accessories for their Q-Snap out of PVC pipes.
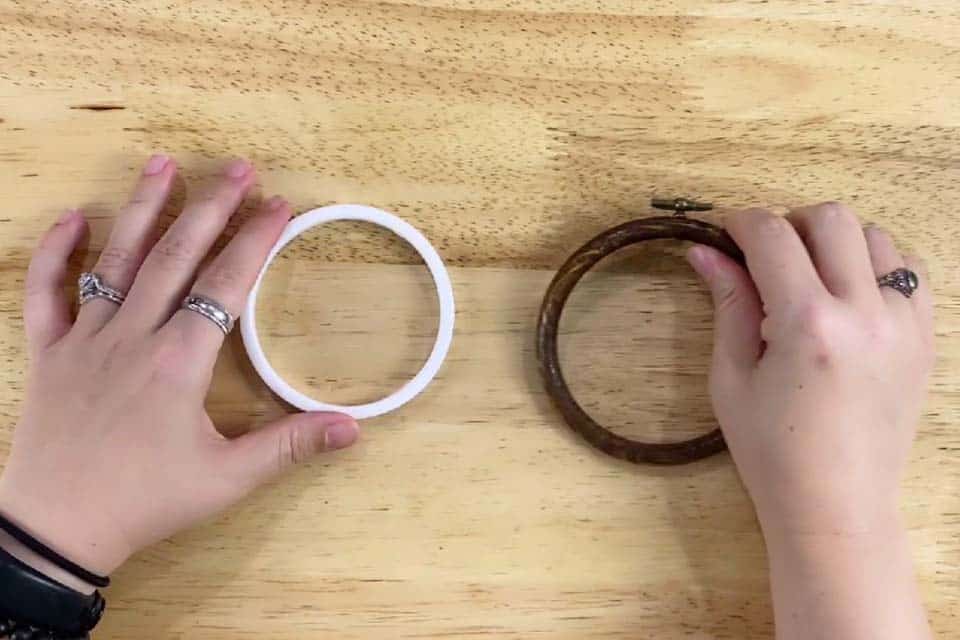
Wood vs. Plastic vs. Metal Embroidery Hoops
Embroidery hoops are made out of wood, plastic or metal.
Metal embroidery hoops have a spring on the outer ring that keeps the tension, and a cork lining the outside of the inner ring to prevent the fabric from slipping. They are usually antique or vintage.

If you find one in good condition, they work pretty well to keep the fabric taut without fiddling with a screw or handles. But metal embroidery hoops went out of style because if the metal rusts, it will stain your fabric.
Wood and plastic are the most popular now.
I prefer using wood embroidery hoops for stitching. Beech and bamboo are popular. I buy bamboo because it is an inexpensive, renewable natural resource and easy to find in any size I need. The wood embroidery hoops may take more time to frame your project in if you want to paint them or add other embellishments.
Some stitchers complain of getting splinters from their wood embroidery hoops, but I’ve never had a splinter or a snag from a wood embroidery hoop in 30+ years.
Plastic hoops are a delight to work with because of the bright colors they come in. Avoid stitching in plastic embroidery hoops where the inner and outer rings have a smooth surface. Your embroidery fabric will slip and sag in these hoops. They’re pretty for framing your finish projects.
Pick out plastic hoops with a groove or ridging between the two rings to hold the fabric.
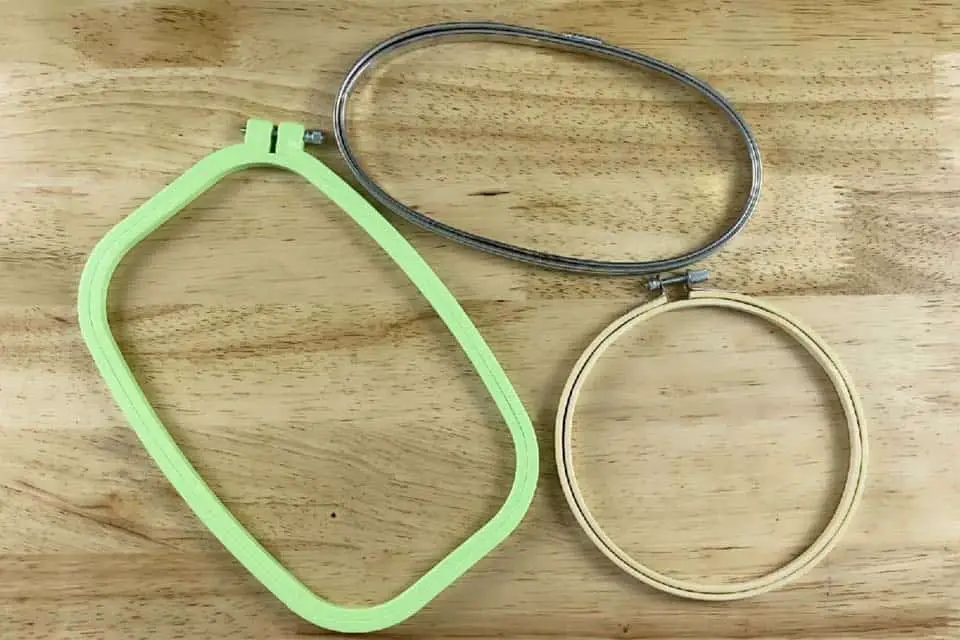
Embroidery Hoop Shapes
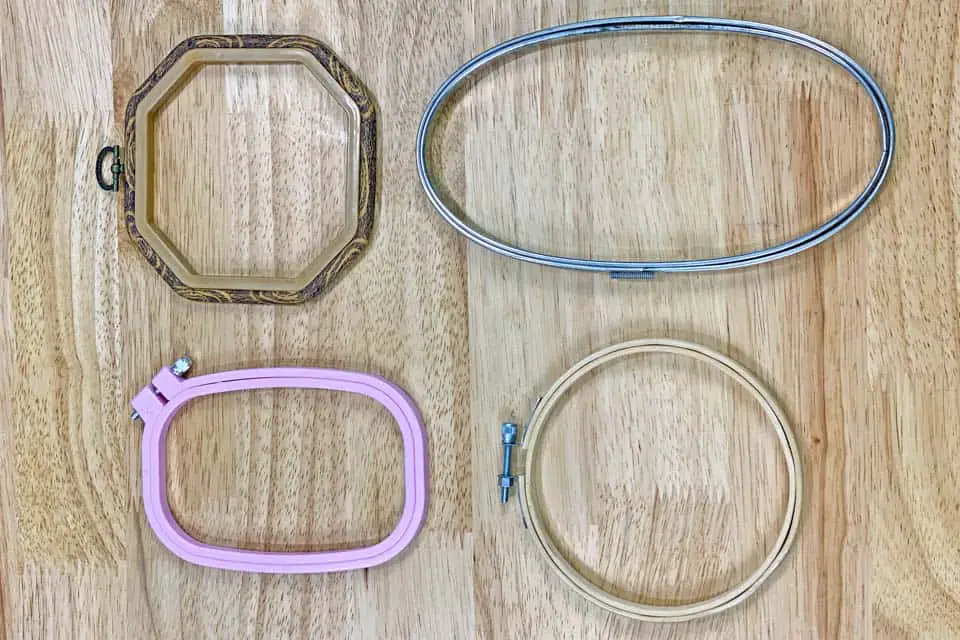
Round is the most common shape and it’s the shape of embroidery hoop that most stitchers use.
Embroidery hoops are available in square, oval or even specialty shapes! You don’t have to use a square hoop for a square pattern, for instance, but it looks nice for framing and finishing.
Which type of embroidery hoop should I use?
Look at the table below. Check the column headers for your stitching situation and find which type of embroidery hoop will most likely work best for you.
The first row represents the situation for using the hoop: Easy to Use, Low Cost, Use to Stitch or Use to Frame.
The left column indicates which type of embroidery hoop or the material it’s made from: Screw Tension, Flexi Hoop, Spring Tension, Q-Snap, Metal, Wood, Plastic.
A green Y means YES, that kind of hoop would work well for that situation.
A red N means NO, that kind of hoop would not work well for that situation.
| Type | Easy | Low Cost | Stitch | Frame |
|---|---|---|---|---|
| Screw | Y | Y | Y | Y |
| Flexi | N | N | N | Y |
| Spring | N | Y | N | N |
| Q-Snap | Y | N | Y | N |
| Wood | Y | Y | Y | Y |
| Plastic | Y | Y | Y | Y |
| Metal | N | N | N | Y |
How big should my embroidery hoop be?
Your embroidery hoop should be 2 inches bigger than your pattern. This leaves about an inch or more of fabric space on all sides.
Embroidery hoops are measure by diameter. They come in a range of sizes from tiny 1-inch hoops to wear as jewelry to large 12-inch hoops (and larger) for quilting.
If you’re stitching up a very large project – larger than 12 inches, the best size embroidery hoop for cross stitch is 6 inches to 8 inches. When you’re done stitching a section of your cross stitch project, remove the fabric from the embroidery hoop and place it over a new section. At this size, the embroidery hoop is easily manageable while providing room to get in several hundred stitches before moving it.
An embroidery hoop larger than 12 inches is just too big and unruly to hold on to and stitch in. Hoops this size or larger are more easily manageable when used with a lap stand or floor stand – but that’s a tutorial for a different day.
Many cross stitch kits will have a perfectly-sized embroidery hoop included in the kit.
Use the Cross Stitch Calculator to see how big your fabric should be.
How much does an embroidery hoop cost?
New embroidery hoops range in price from $1US to $30US. Smaller, round hoops made from common materials will be less expensive than larger hoops or hoops made into irregular shapes.
Used embroidery hoops are a GREAT find because they are often available at a teeny, tiny fraction of the cost of new hoops.
Where can I buy embroidery hoops?
Embroidery hoops can be purchased at your local hobby store. You’ll also find a large variety available on the internet. My favorite places to shop the net are:
Find second hand embroidery hoops at thrift stores, yard/garage sales, estate sales and places online like Facebook Marketplace, Offer Up, or your neighborhood might have a local trading website.
How do I know if I should use an embroidery hoop?
If you’re not sure about whether or not you should use an embroidery hoop, get a small kit that comes with a hoop. There are many available at your local craft store or online that are less than $10 USD. I recommend the small kits for beginners put out by Dimensions. Then, try it out!
If you don’t like cross stitching with an embroidery hoop, you can always ditch the hoop and keep stitching.

Part 2: How to Use Embroidery Hoops
Getting Started with Embroidery Hoops
Before you start, it’s always a good idea to wash your hands. I know, I know – it’s not a RULE, per se, more of a guideline. 🙂 Washing your hands before you handle any embroidery supplies will help keep your fabrics and threads in the best condition and looking their best.
Then, prepare your fabric as needed. If you’re using one of those small beginner kits that I recommended above, you can skip this step. If you’re using your own fabric, check out this tutorial for how to prepare your fabric for happier cross stitch.
Watch the Embroidery Hoop Basics Part 2 Video Tutorial
Secure Fabric in a Screw Tension Embroidery Hoop
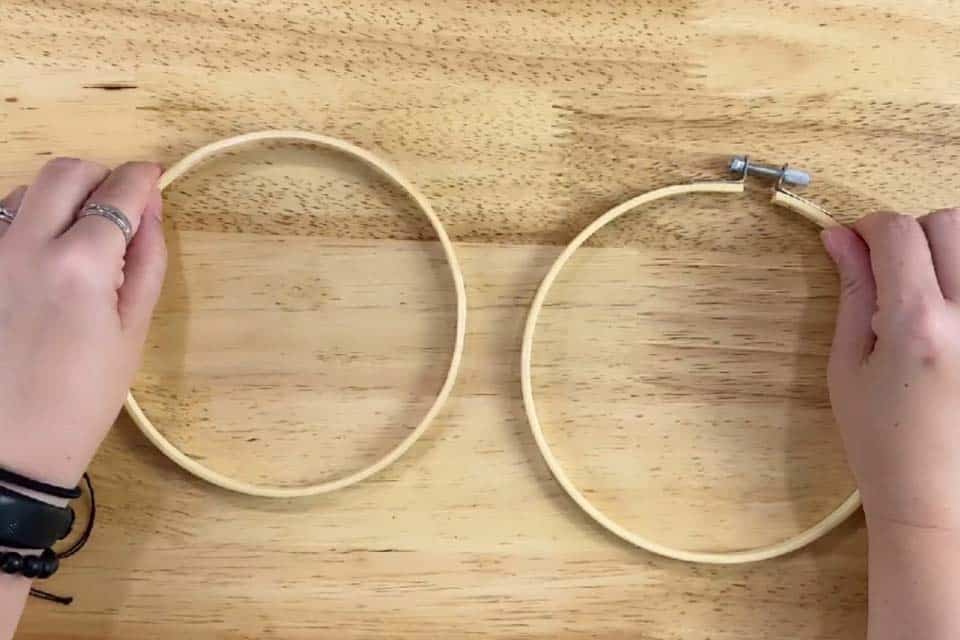
Loosen the screw, but not all the way.
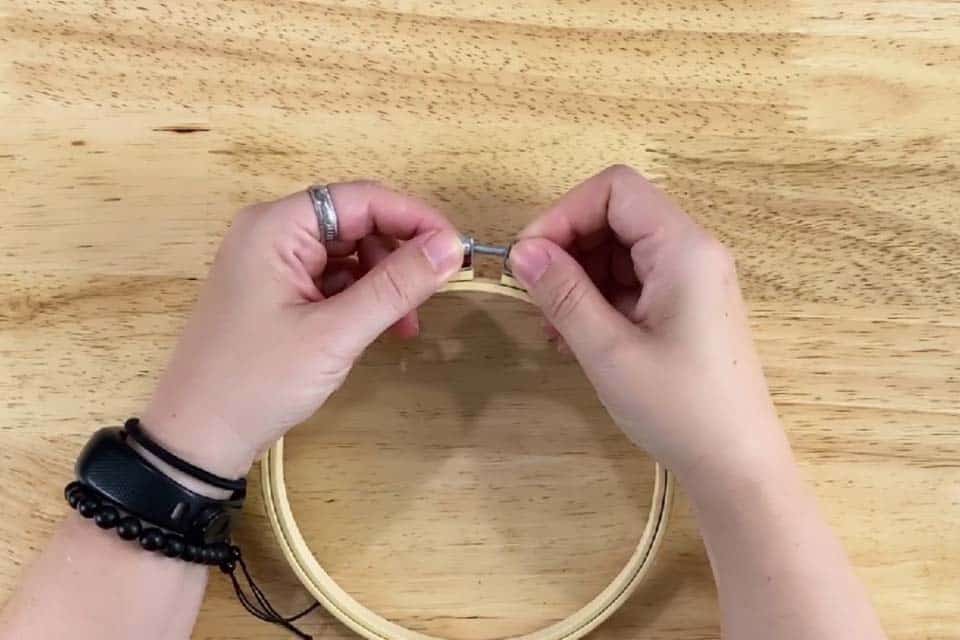
Then separate the inner ring from the outer ring.
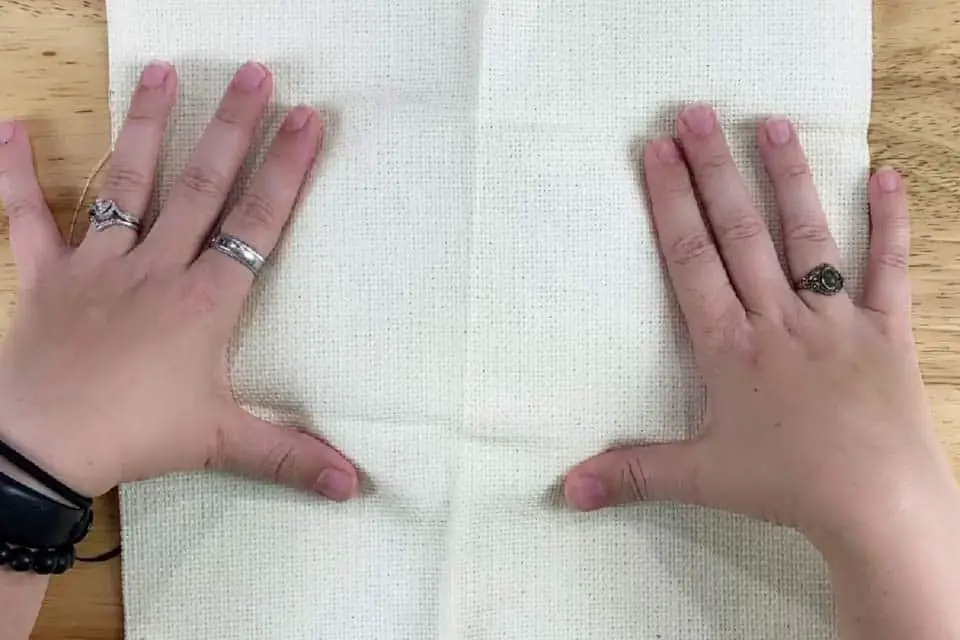
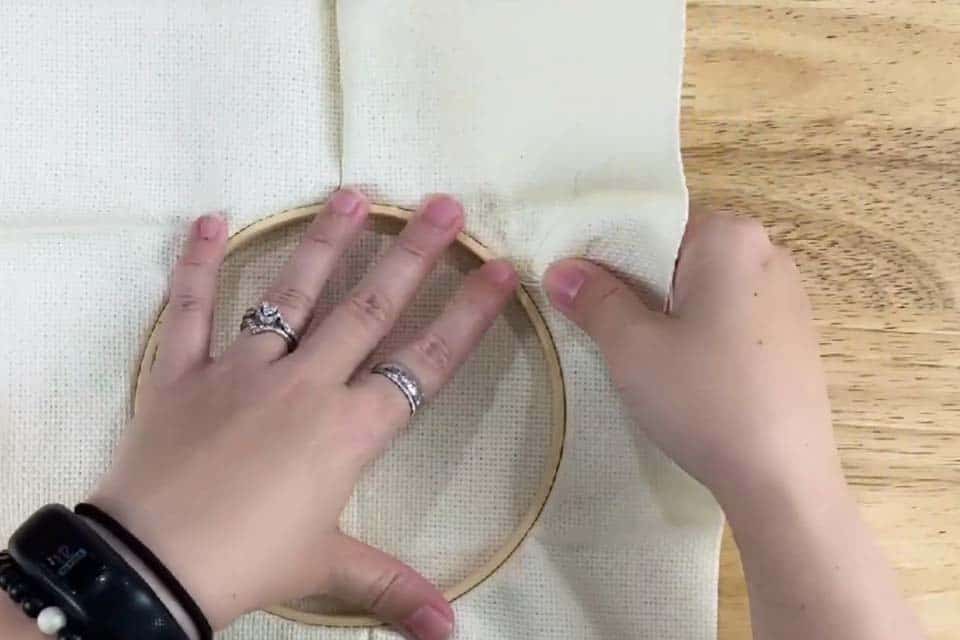
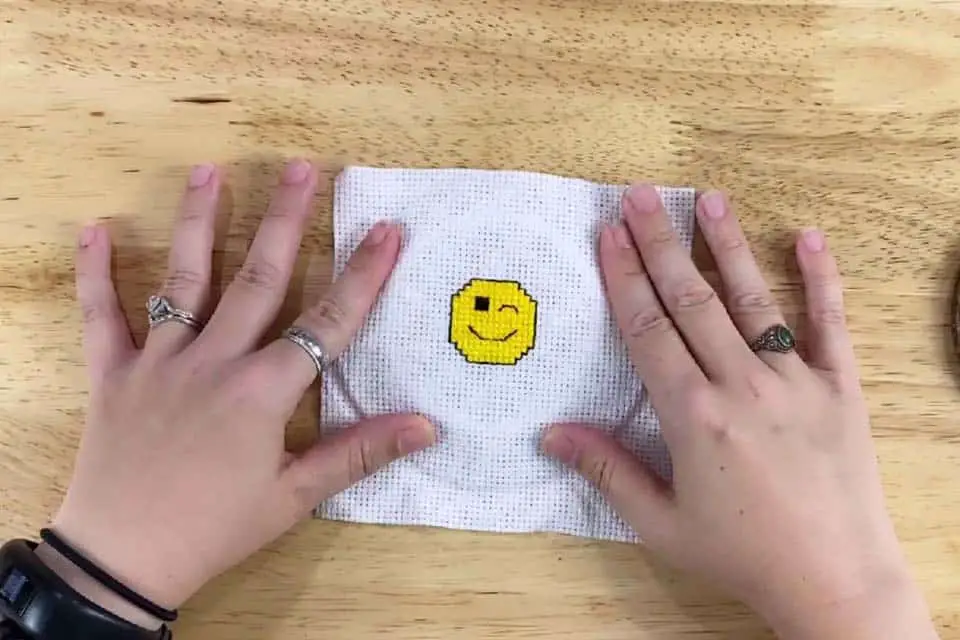
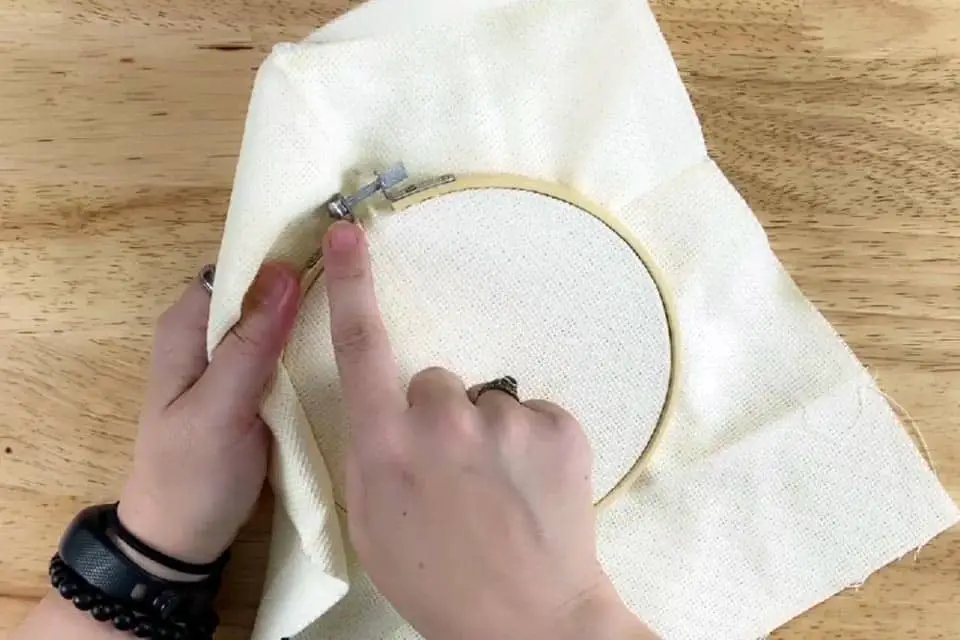
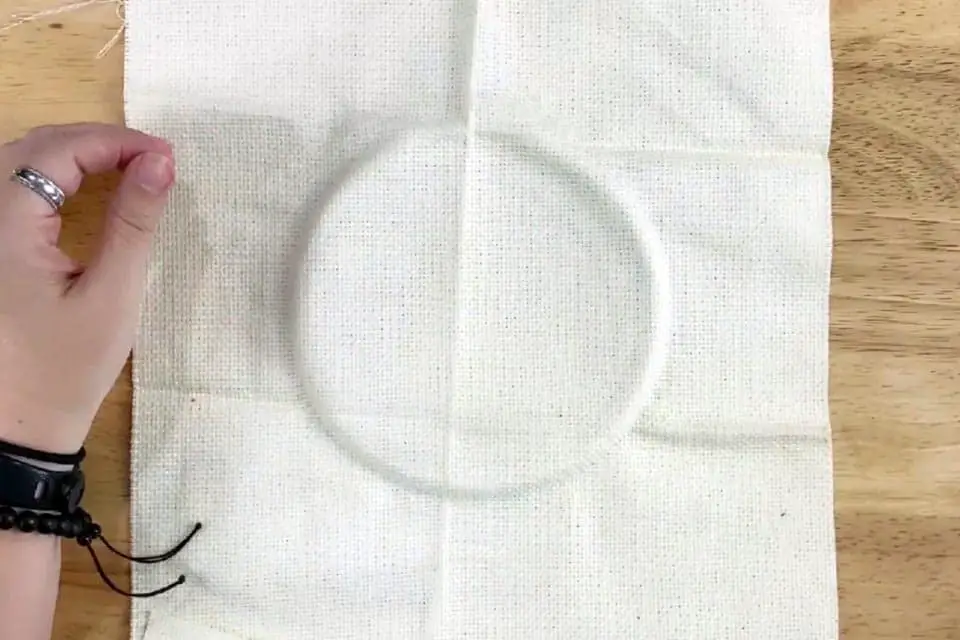
Drape your fabric over the inner ring. I like to press down on the fabric so I can see the shape of the ring underneath, and check that the fabric is right where I want it. The fabric might sag a little, and that’s ok at this point.
Note: Some plastic screw tension embroidery hoops have a mark that reads: “This Side Up” on the inner ring.
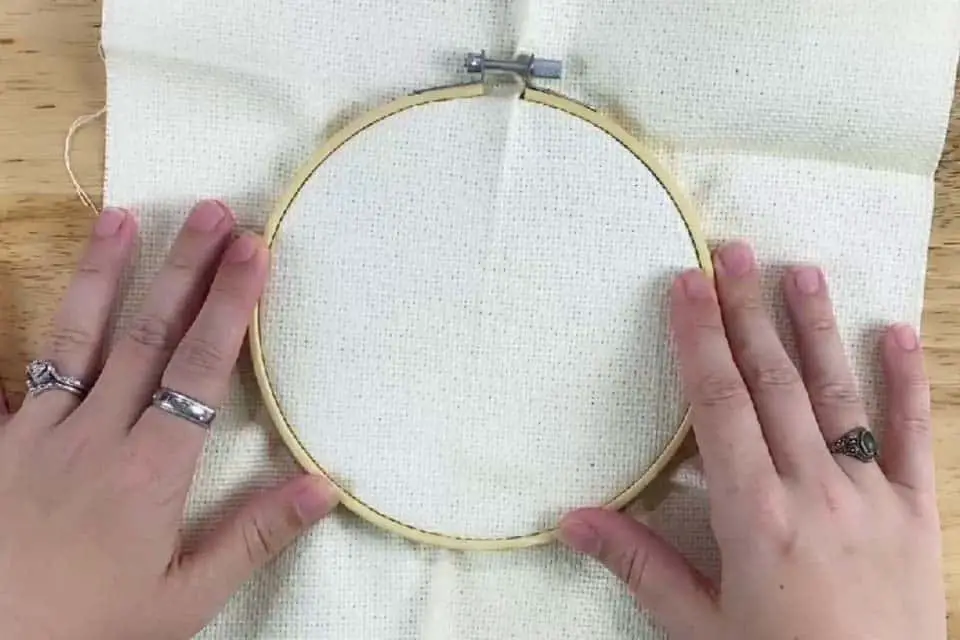
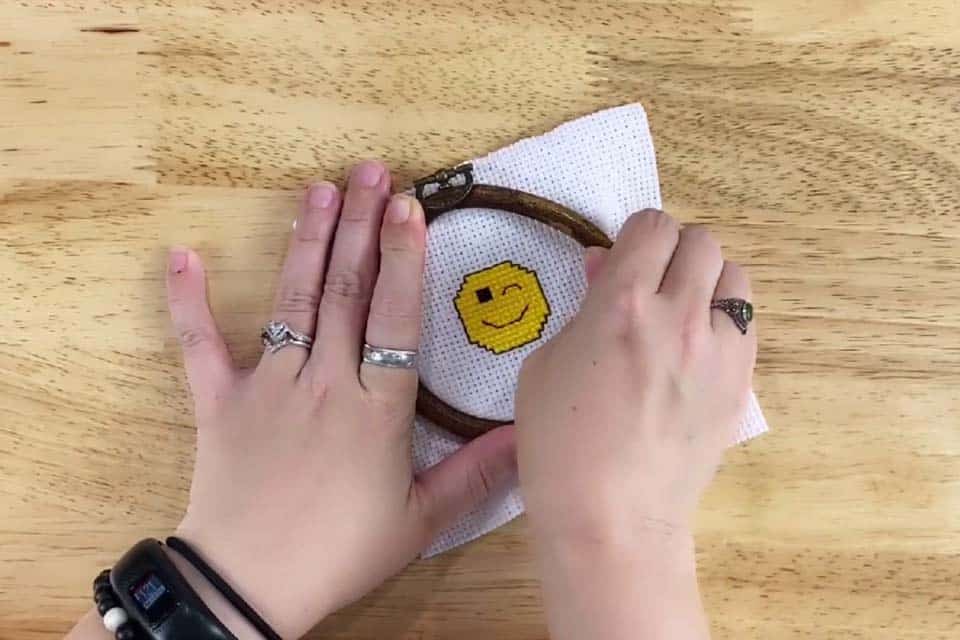
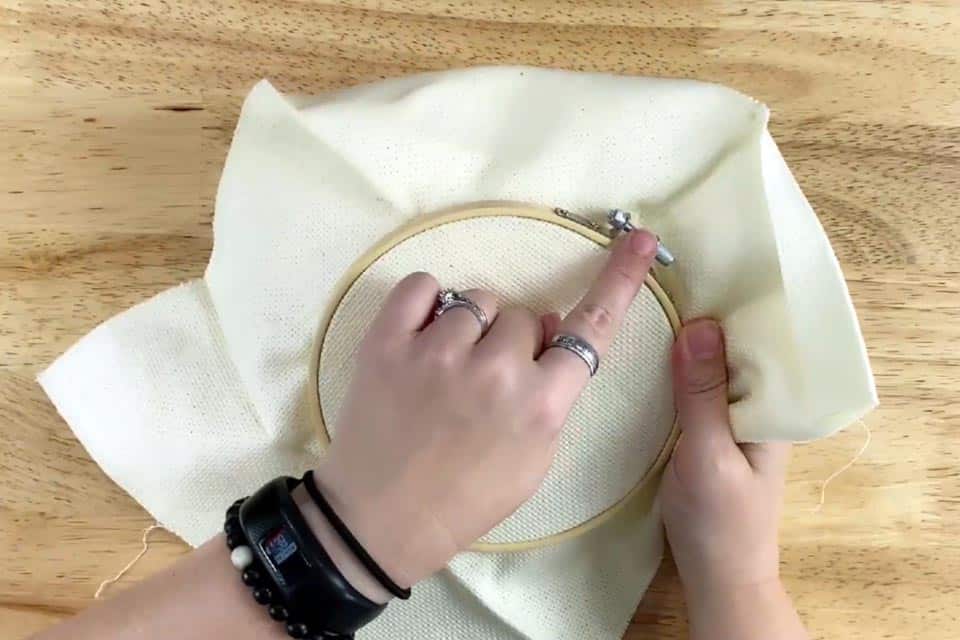
Place the outer ring over the fabric press down so that it slides over the inner ring under the fabric. Use both hands to press down evenly on opposite sides of the hoop until the inner ring is snug inside the outer ring.
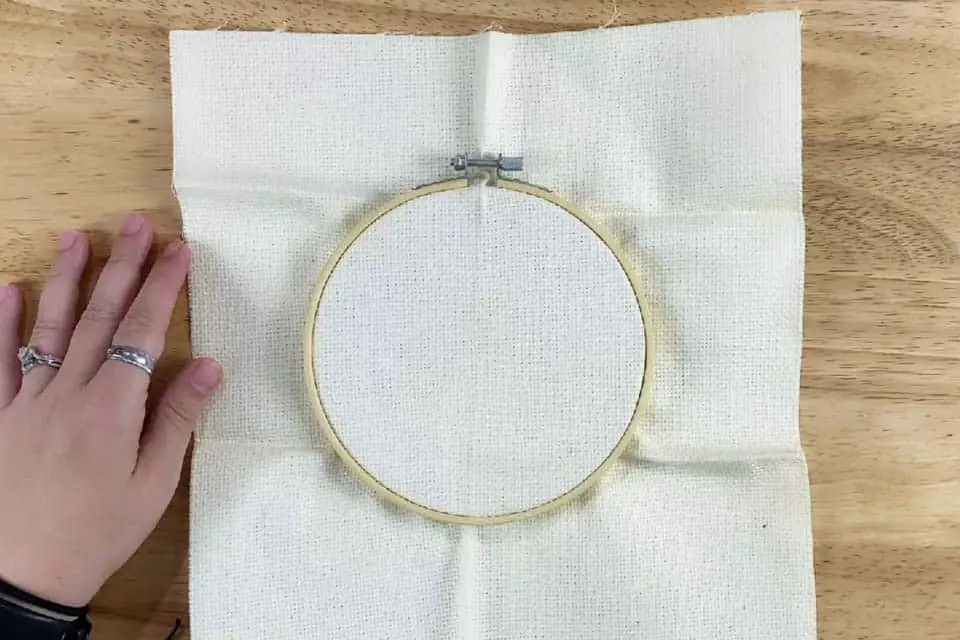
Try not to pick up the hoop until the outer ring is all the way around the inner ring. Keeping it on a flat surface will help you line up the rings so they’re even. If you pick it up, it’s easy to push too hard on one side of the outer ring and it slides off at the opposite side.
If you can’t get the outer ring over the fabric, loosen it a bit more and try again.
And if it feels really loose, remove the outer ring, tighten the screw, and try again.
The tension of the fabric should already feel tight. Tighten the screw with your fingers, but not all the way.
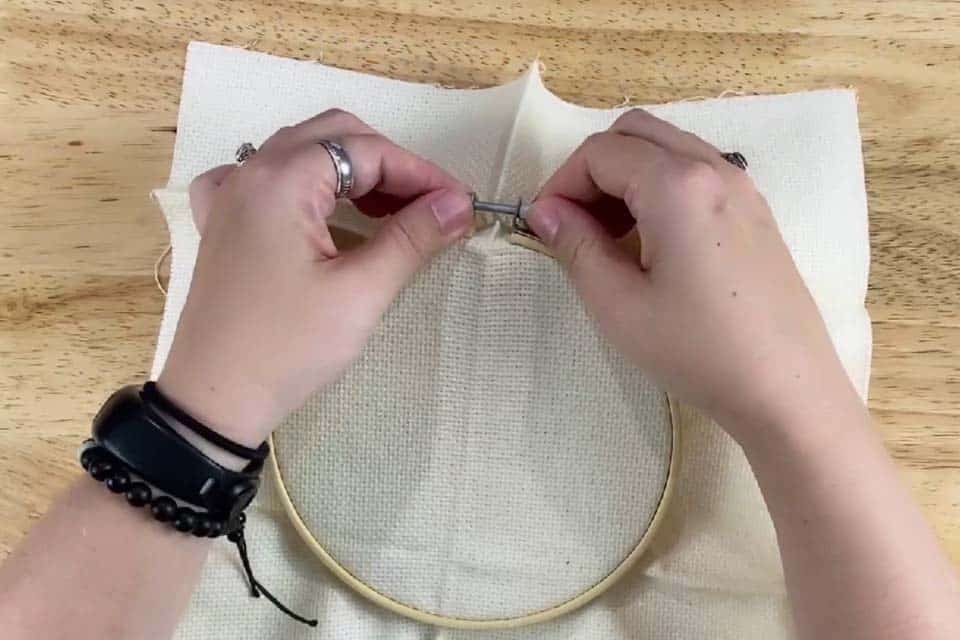
Place the hoop with fabric top-down and tug around evenly on all sides in a circle. You can also tug at the opposite edges of the fabric. Push back on the inner ring to keep it from coming loose while you tug. You want your fabric tight and snug in the hoop all around. This will even out any bumps or puckers in the fabric. Don’t pull so tight that the fabric becomes distorted.
Tighten the screw all the way this time. With some hoops, you can also use a screwdriver!
Secure Fabric in a Flexi Embroidery Hoop
Separate the inner and outer rings. You need to sort of roll the outer ring away from the outer ring.
Place fabric over inner ring. Position this exactly where you want it because it’s harder to adjust the fabric after getting the outer ring back on. I like to press down on the fabric so that I can see the outline of the inner ring through the fabric.
Push and stretch the outer ring over the inner ring and fabric. This will take a bit of maneuvering and dexterity. Sometimes, I ask for help from my husband because I need another set of hands!
If your fabric isn’t taut enough, or if it isn’t centered the way you want, you’ll have to remove it from the flexi hoop. Most are so tight and strong, you won’t be able to tug at the edges of the fabric to move it around inside the hoop.
Secure Fabric in a Spring Tension Embroidery Hoop
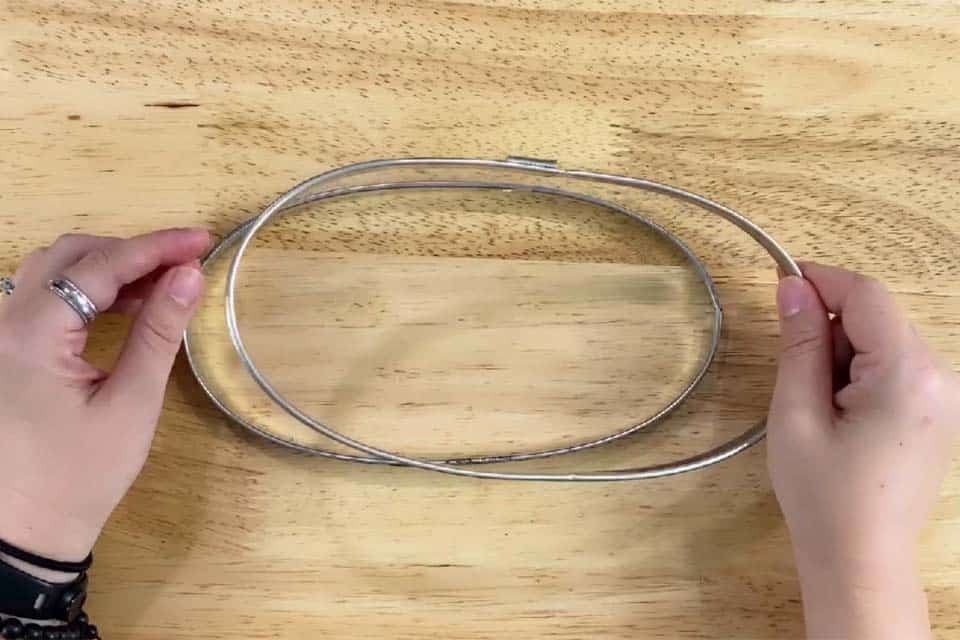
Squeeze the metal handles together and separate the inner right and outer ring of the embroidery hoop.
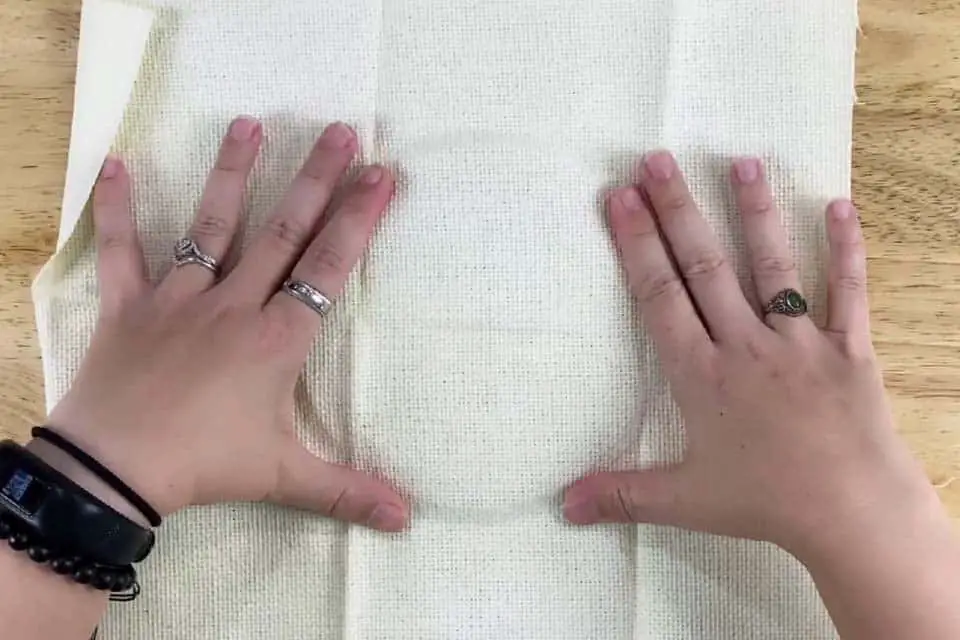
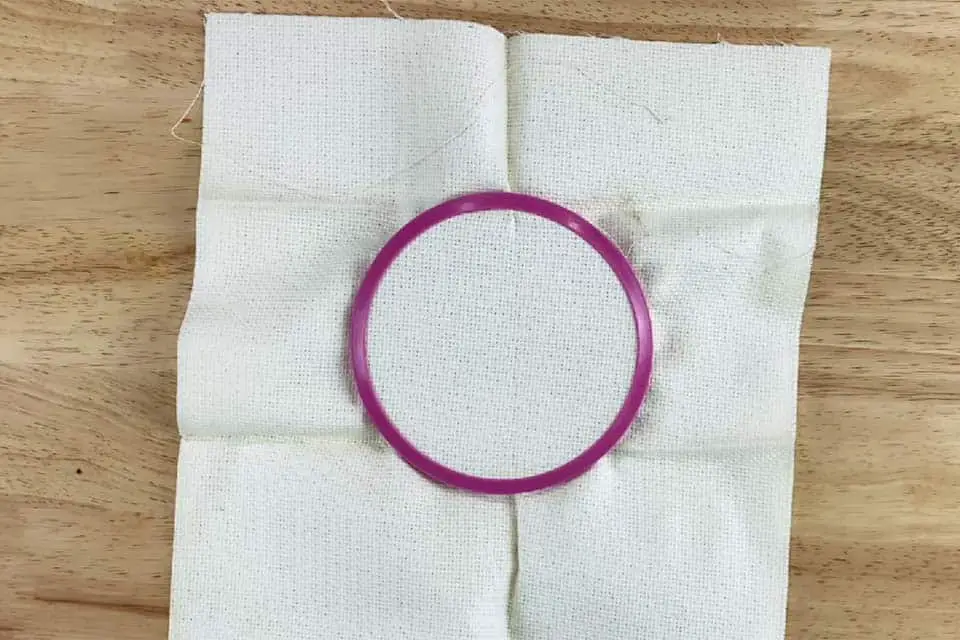
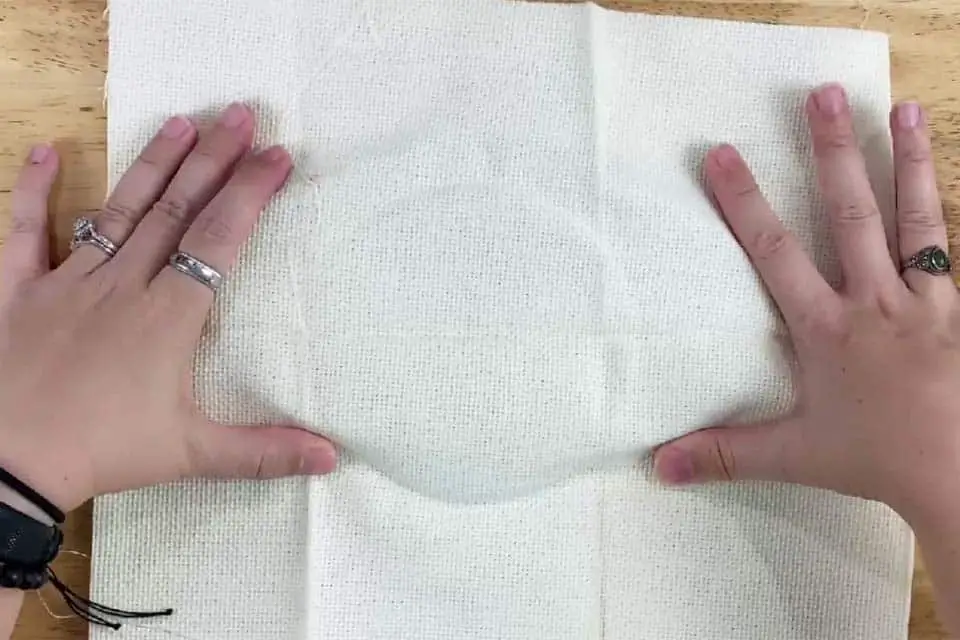
Place the outer ring on a hard, flat surface. Drape your fabric over the outer ring and press down a little so you can see the shape of the ring through the fabric.
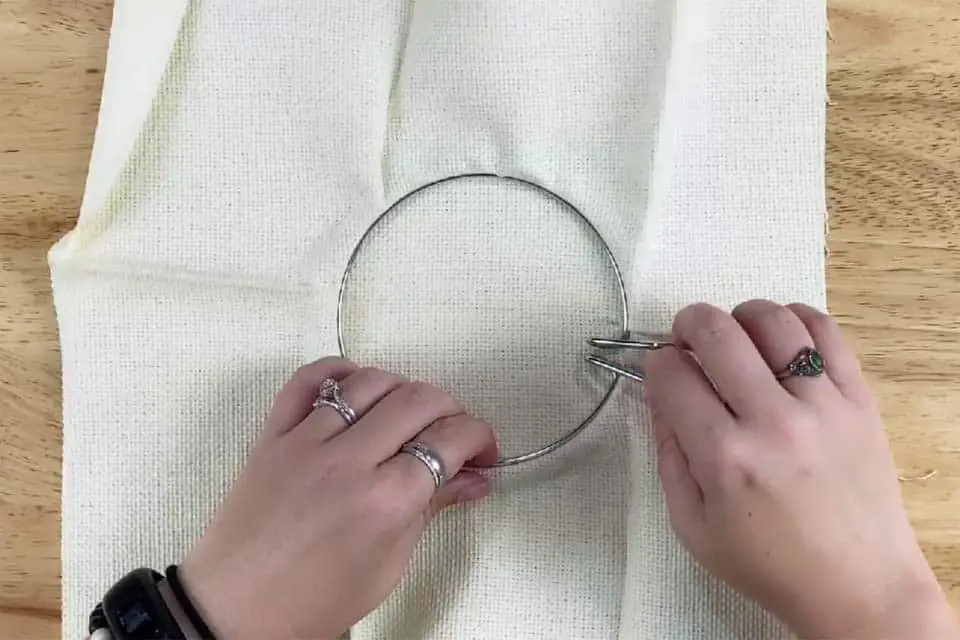
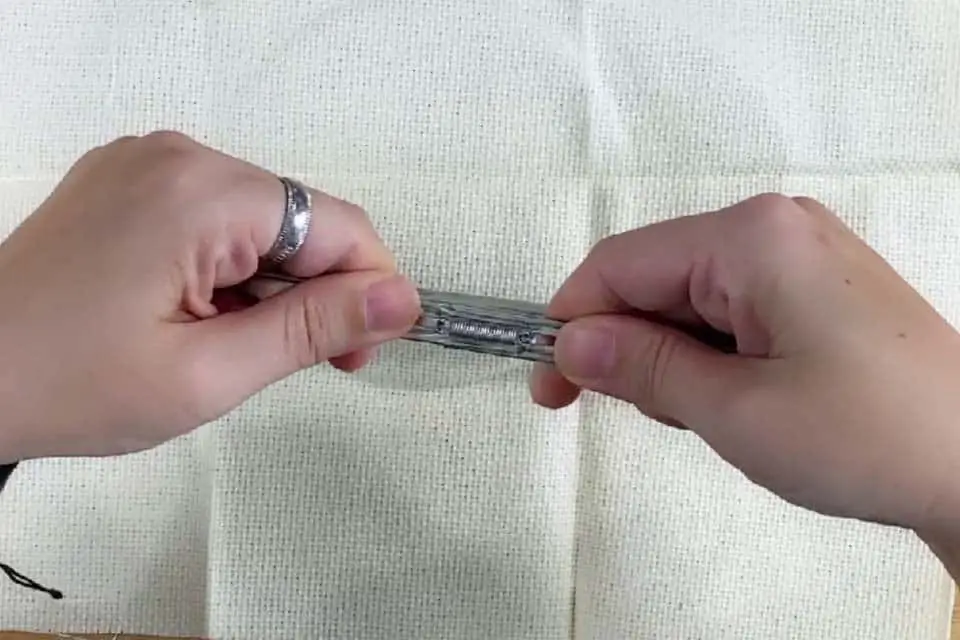
Squeeze the handles on the inner metal ring, and push it into the fabric until you feel it nestling inside the groove of the outer, plastic ring.
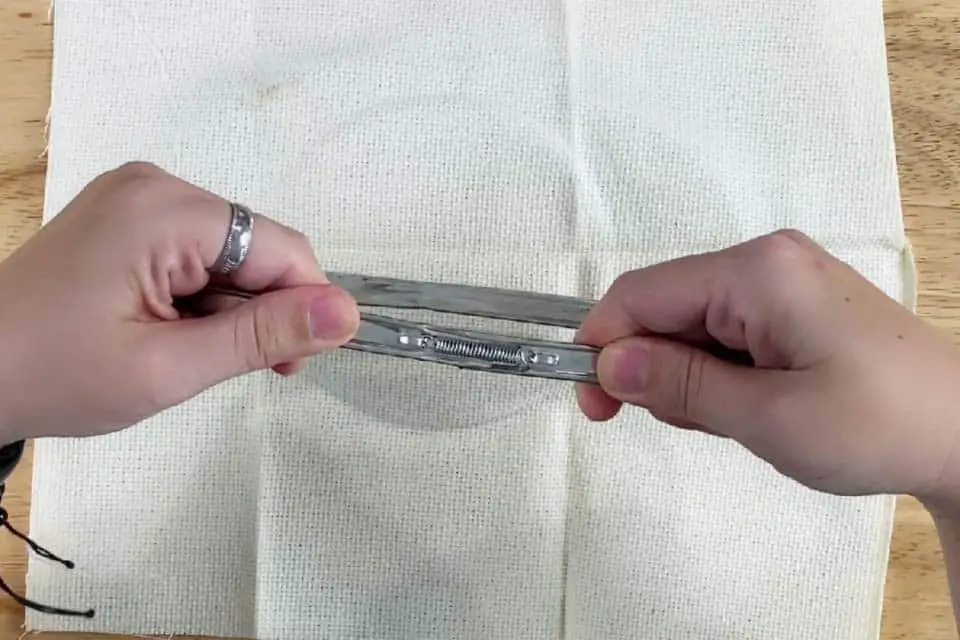
Is your spring tension embroidery hoop too loose? Stretch out the inner ring by pulling apart the metal handles and it will stay more firmly in place. Then, try placing the fabric in the hoop again.
Be careful when using spring tension hoops! Let go of the inner ring the wrong way, and it can spring out of your hand. Also, the handles are big and I find that the embroidery floss catches on them while I’m stitching.
Leave the hoop and fabric top down on a hard, flat surface before tugging on the edges of the fabric. Otherwise, it could pull the inner ring right out.
Secure Fabric in a Vintage Metal Embroidery Hoop
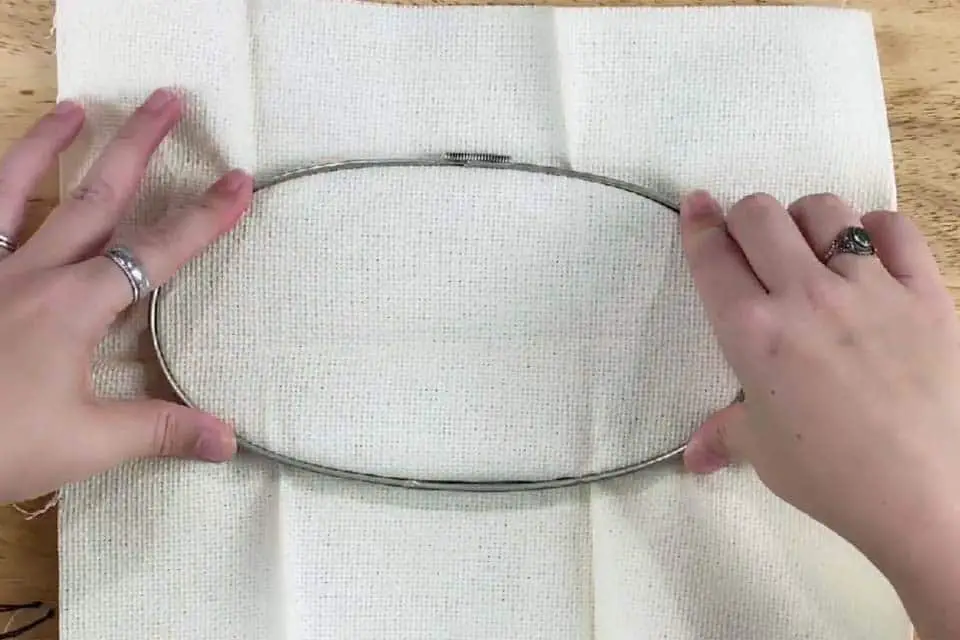
First, separate the inner and outer rings of the metal embroidery hoop.
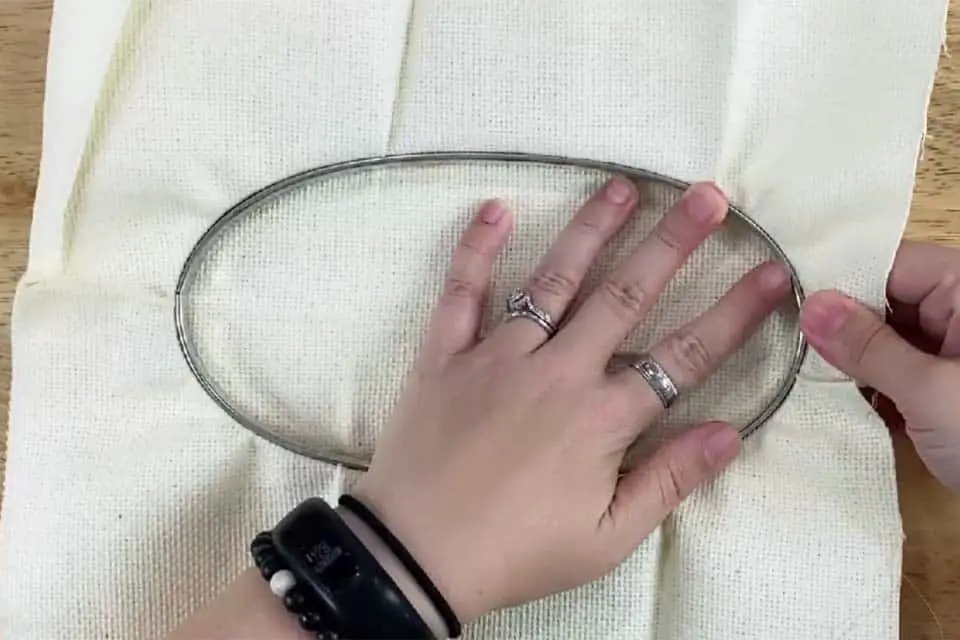
Then, drape your fabric over the inner ring. If you press down on the fabric, you can see the shape of the ring underneath and check that the fabric placed where you I want it.
On the outer ring, gently pull apart the two sections connected by the spring. Most metal embroidery hoops are vintage, so be very careful with this. Try to avoid pulling so hard that the spring breaks.
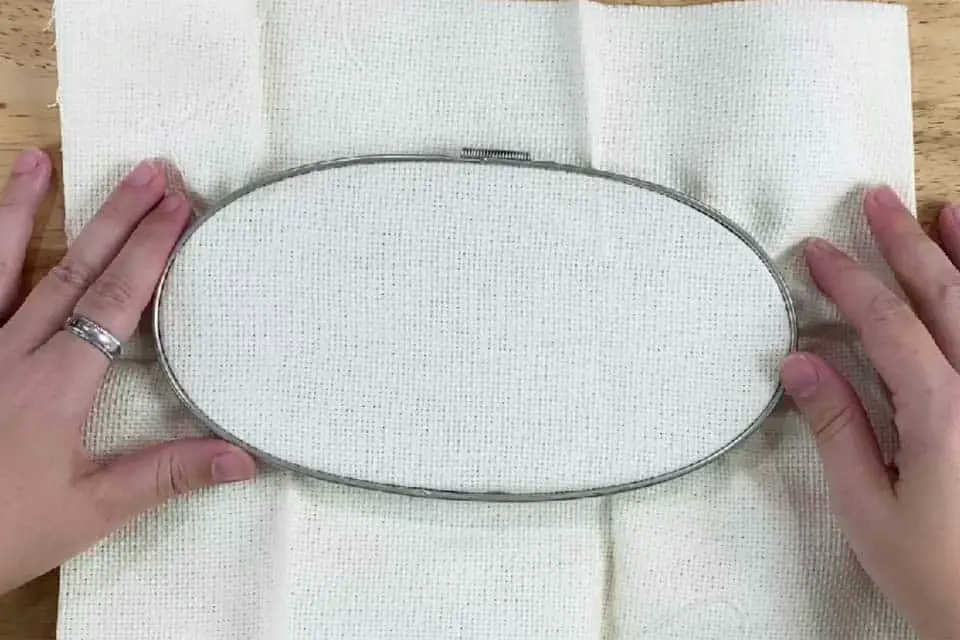
Place the outer ring over the fabric press down so that it slides over the inner ring under the fabric. Use both hands to press down evenly on opposite sides of the hoop until the inner ring is snug inside the outer ring.
Try not to pick up the hoop until the outer ring is all the way around the inner ring. Keeping it on a flat surface will help you line up the rings so they’re even. If you pick it up, it’s easy to push too hard on one side of the outer ring and it slides off at the opposite side.
If the fabric is a little loose, flip the hoop over and gently tug at the edges of the fabric while holding down the inner ring.
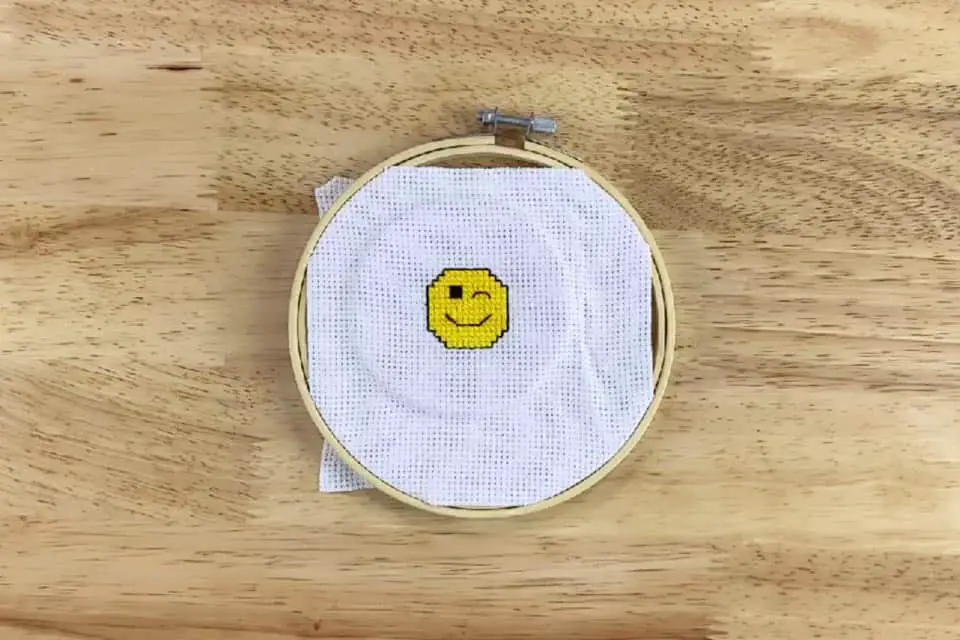
When the fabric is firm and taut, start stitching!
Secure Fabric in a Q-Snap Embroidery Frame
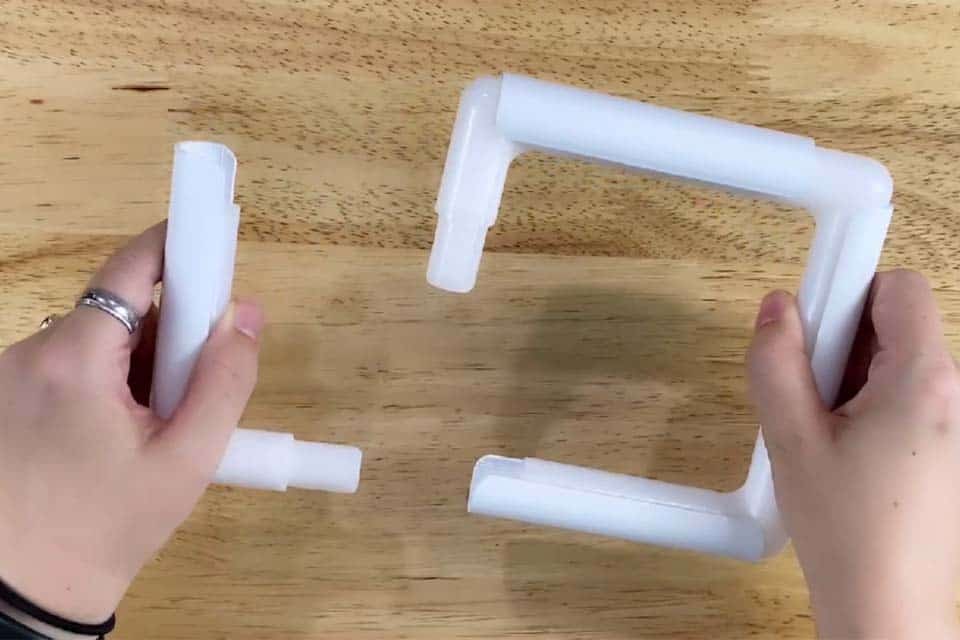
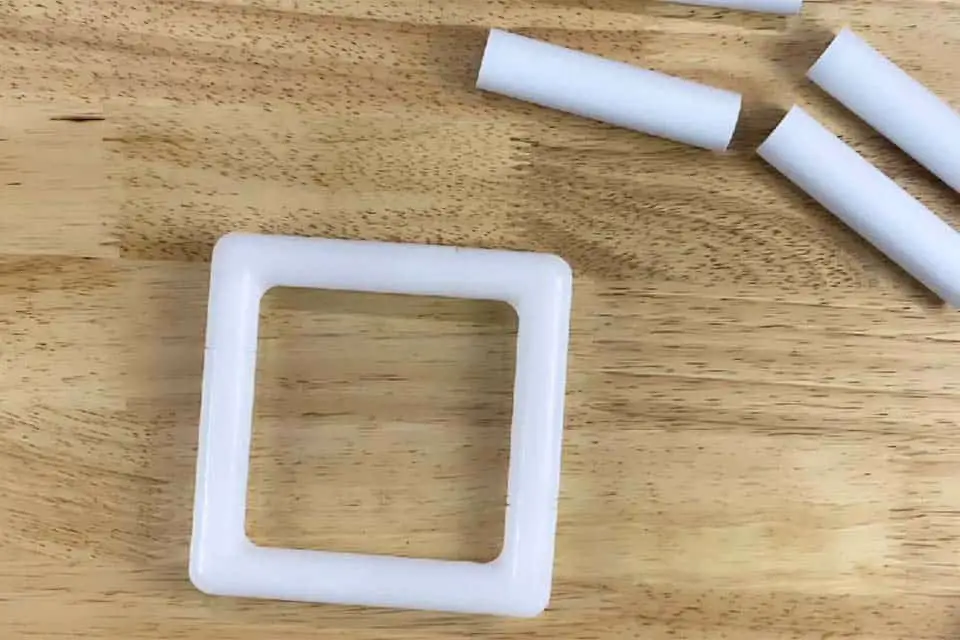
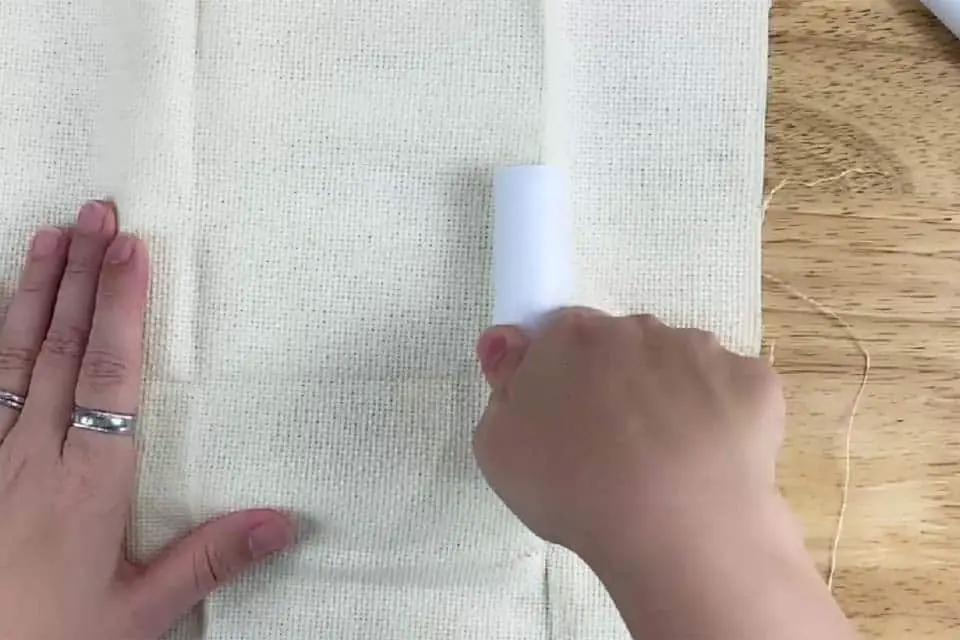
First, assemble the Q-Snap. It usually comes in 4 pieces that fit together to form a square or rectangle.
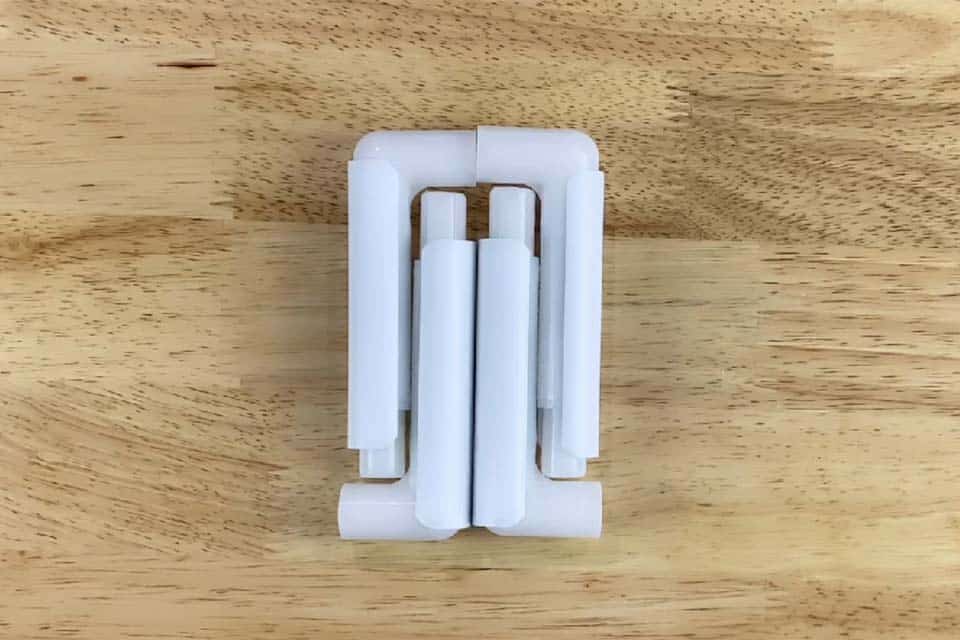
How do you assemble a Q-Snap hand embroidery frame?
Avoid putting the pieces together two at a time (left). When you are ready to assembly the final piece, you won’t be able to fit it together.
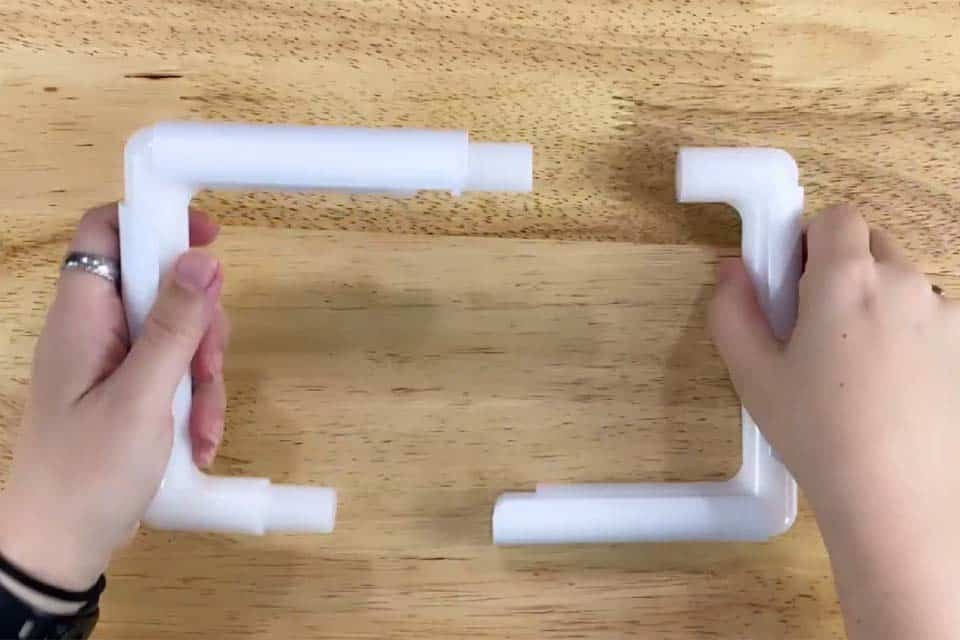
Instead, assemble two pieces, then assemble the two other pieces, so that you now have two sections (right). Done this way, the two sections fit together easily.
If your Q-Snap came with the clamps attached, remove them now.
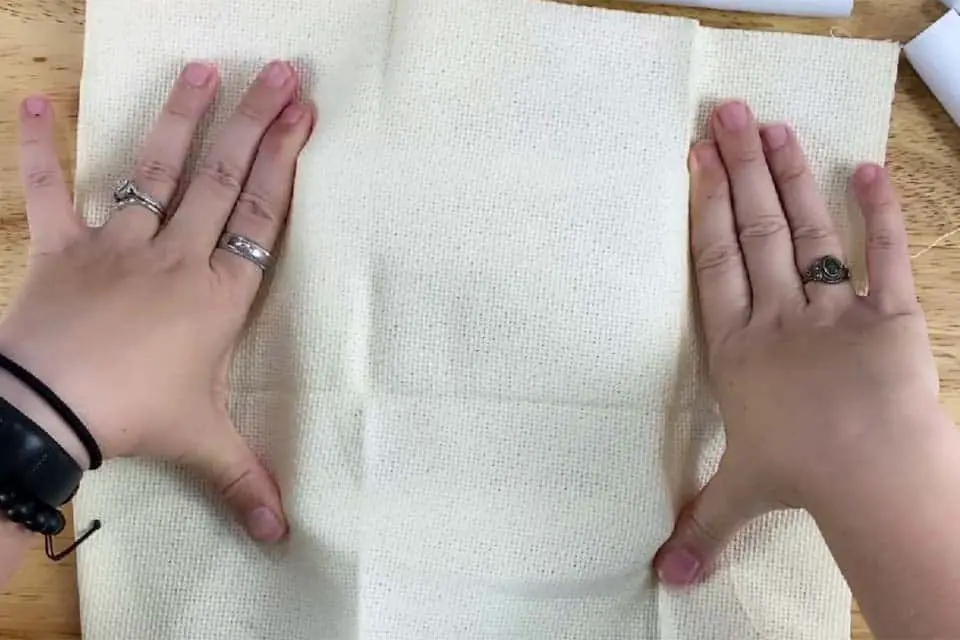
Next, drape your fabric over the Q-Snap frame. If you press down on the fabric around the frame, you can see the shape of the frame underneath. Use this to make sure your fabric is where you want it to be on the frame.
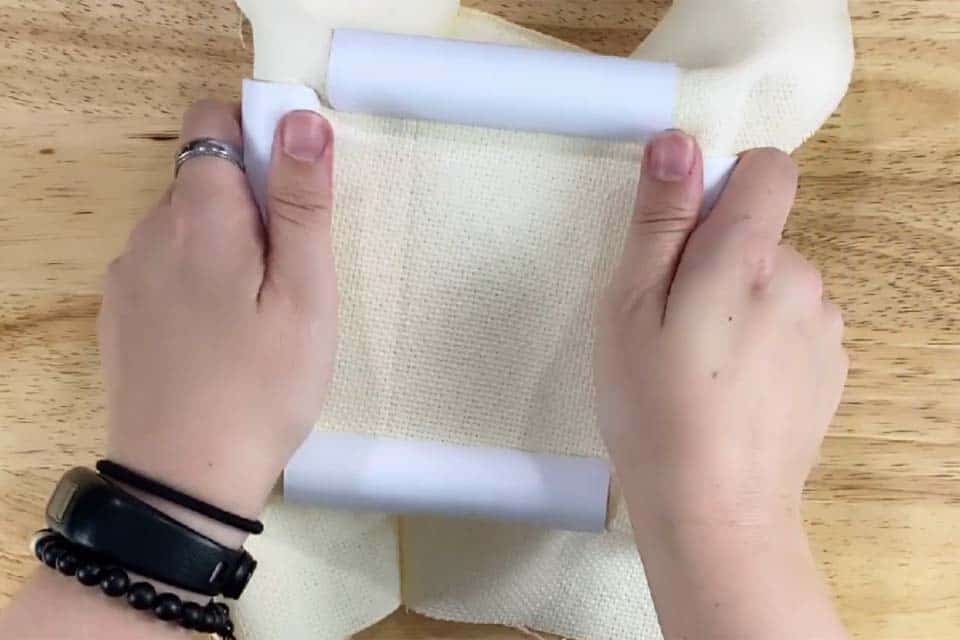
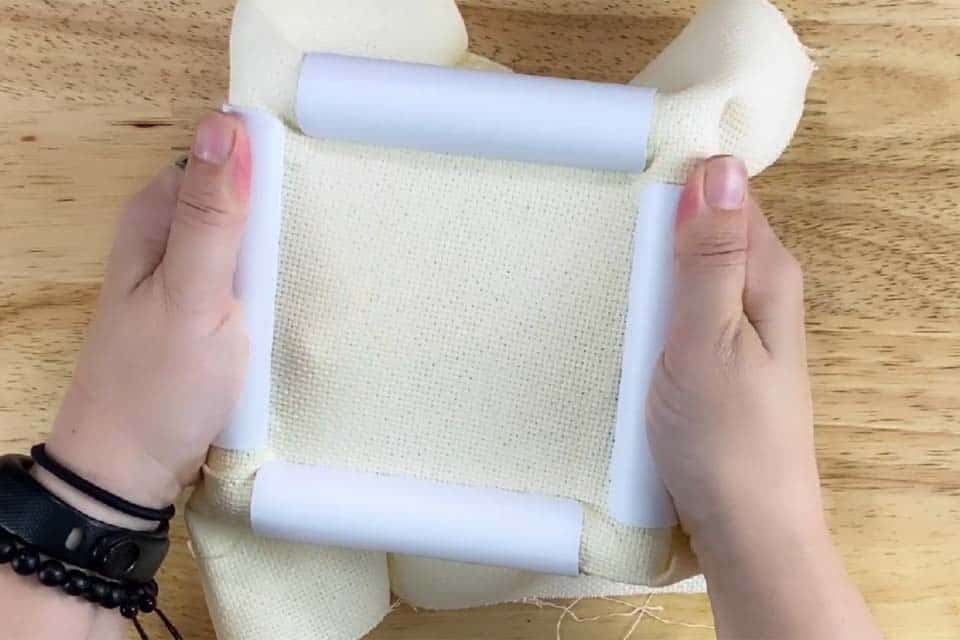
Take each Q-Snap clip and press it down over the fabric until it clicks into place. Do this for all 4 clips.
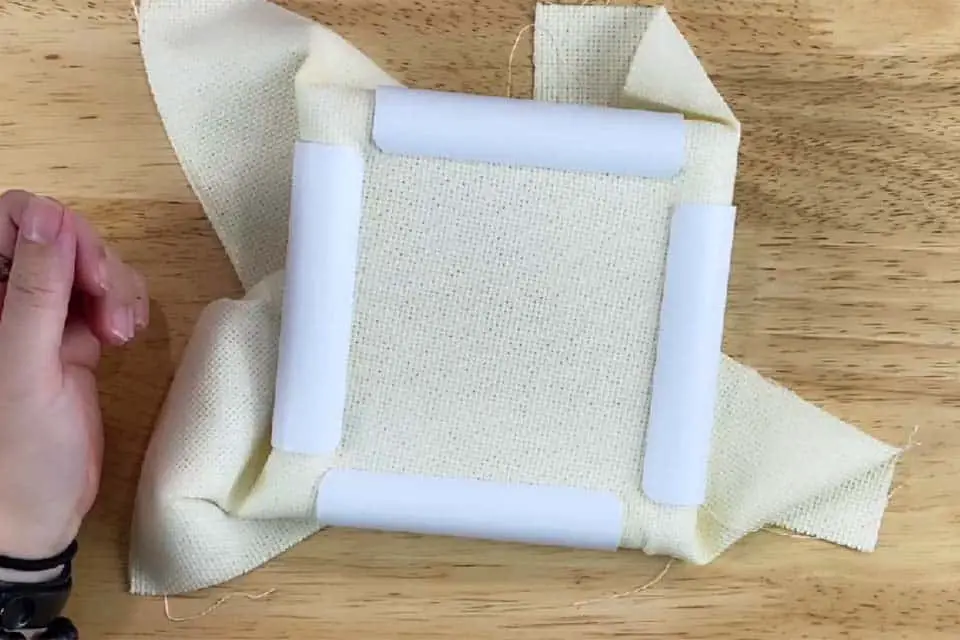
To tighten the fabric in a Q-Snap, first grip opposite sides of the frame (left). Then, slowly rotate the clips from the inside to the outside of the frame (right). Turn the frame 90 degrees in your hands so that you are now gripping the other two opposite sides. Repeat the rotating action, so that the clips are turned towards the outside of the frame.
That’s not going ANYwhere!
Embroidery Hoops Tips and Hacks
Your Fabric Does Not Need to be the Same Size or Shape as Your Embroidery Hoop
It’s important that the fabric is BIGGER than the embroidery hoop (remember, you can always make the fabric smaller).
Holding Your Embroidery Hoop While Stitching
For right-handed stitchers, hold the hoop so that the screw, clasp or hanger at the top of the hoop is positioned at “10 o’clock”. So that when you stitch with your right hand, the floss doesn’t get tangles up in the hoop hardware.
Left-handed stitchers should hold the hoop so that the screw, claps or hander at the top of the hoop is positioned at “2 o’clock” to avoid floss getting caught up in the hoop hardware.
Spring Tension hoops are a little different, because the hardware is behind the fabric. The best way to avoid getting floss tangled in the clasps of a spring tension embroidery hoop is to hold the clasps in your non-stitching hand.
Stitch in the Ditch (aka Stitch in the Well)

If you’ve every run out of room to bury your threads in the back of a cross stitch project while stitching in an embroidery hoop, you’re not alone. When you try to bury the thread, the needle hits the inside of the embroidery hoop. This is especially true for smaller projects, when the hoop is only 4″ in diameter or less.
Try to “Stitch in the Ditch” (aka Stitch in the Well). This means that you flip the hoop over, so that the FRONT of your project is facing the depression or bowl created by the hoop. And the back of your project is flush with the edge of the embroidery hoop.
Now, when you bury the thread under the stitches near the edge of the hoop, the needle will slide effortlessly over the edge.
Can you Keep Your Cross Stitch Project in the Embroidery Hoop When You’re Not Stitching?
It’s not recommended to leave your cross stitch project in the embroidery hoop for long periods of time. The hoop can squish your stitches or distort the fabric over times.
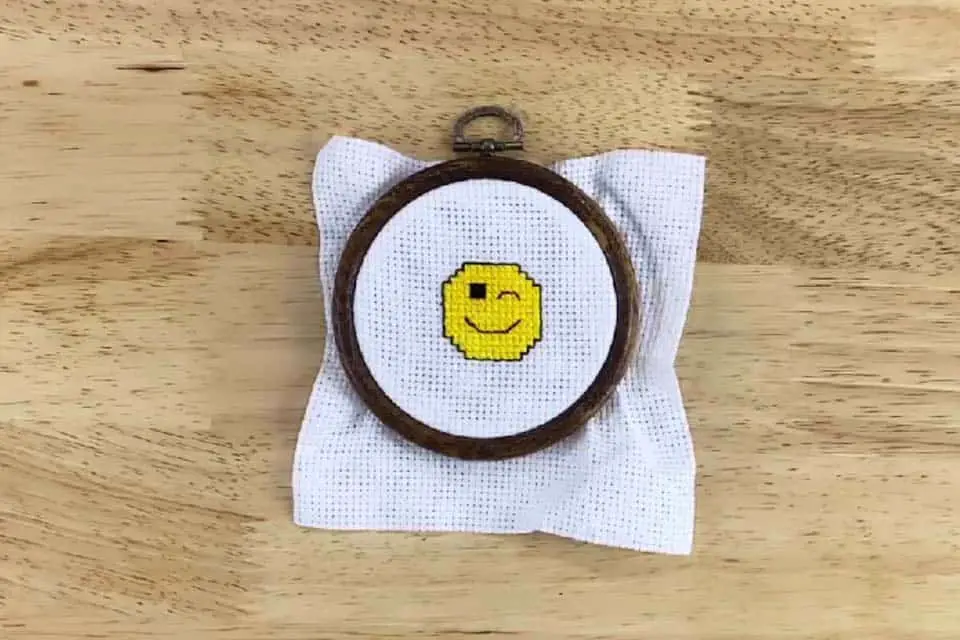
If your cross stitch project is small enough to fit in the hoop when it’s finished, you can leave the fabric in the hoop for as long as you want. This can be really convenient if you decide to frame your project in the hoop.
Can I Cross Stitch Even if My Fabric is Too Small for My Embroidery Hoop?
You cannot stitch if the fabric is too small for the embroidery hoop because there isn’t enough tension on the fabric.
If only one edge of your fabric is showing inside your embroidery hoop, take the fabric out and re-center it inside the hoop.
If more than one edge of your fabric is showing inside your embroidery hoop, stop and use a smaller embroidery hoop.
What if My Fabric Slips or Sags in the Hoop?
If your fabric slips or sags in an embroidery hoop, the tension on the fabric is too loose.
Flip the embroidery hoop over and tug at the edges of the fabric. Make sure to hold the inner ring of the embroidery hoop in place so it doesn’t slip out.
Screw tension embroidery hoops give you the option of tightening the grip of the hoop on the fabric to prevent the fabric from slipping. Some of the screw mechanisms will have a flathead or Phillips head screw.
What Do I Do With All the Extra Fabric Around my Embroidery Hoop?
To keep the extra fabric outside of your embroidery hoop out of the way, roll in the edges of the fabric, and hold in the same hand that you use to hold your hoop.
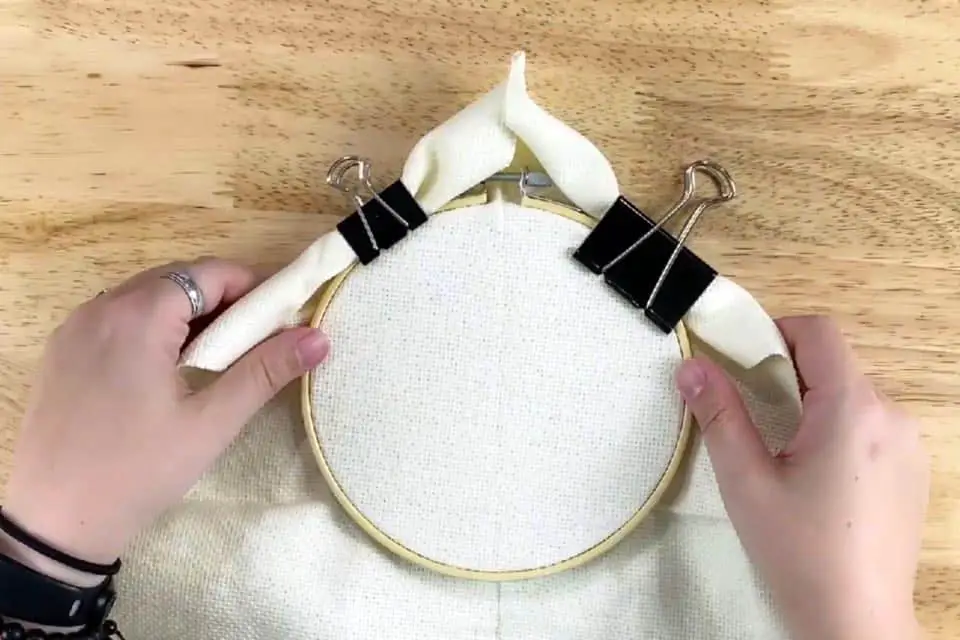
Still have too much fabric? And easy and inexpensive solution is to use binder clips. Roll the fabric, outside to inside, towards the embroidery hoop, and use large binder clips to clips to the hoop and hold the fabric in place.
You could use a grime guard to hold extra fabric around an embroidery hoop.
If you have spool huggers that keep the loose end of your thread in place, these can also work for extra fabric around and embroidery hoop.

How Do You Get Rid of Embroidery Hoop Marks?
Embroidery hoop marks appear when a fabric is removed from an embroidery hoop. There are three types of embroidery hoop marks: transfers, impressions and old fashioned dirt.
Embroidery hoop transfers are marks left by embroidery hoops when some of the color from the hoop transfers onto the fabric. This is rare and usually only happens when an embroidery hoop has been decorated with stain or paint or other colors before placing the fabric into the hoop.
Dirty hoop marks occur when a cross stitch project is left in a hoop, and left out in between stitching. They also happen from stitching with dirty hands. These types of embroidery hoop marks really suck because they happen slowly, over time, and you don’t notice until you remove the fabric from the hoop.
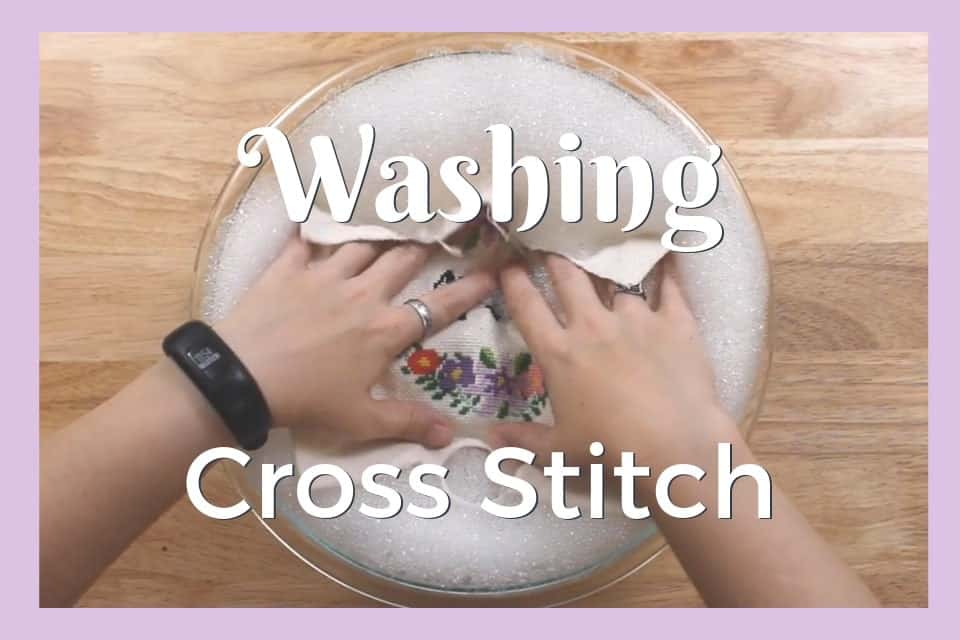
Impressions are embroidery hoops marks that appear as folds or creases when you remove fabric from any embroidery hoop, even if the fabric was in the hoop for seconds. These are easily removed by washing and/or ironing your cross stitch project. I show you how to wash your cross stitch project here, and how to iron your cross stitch project here. (Remember to check the manufacturers’ instructions for the care and maintenance of your fabrics and flosses before washing or ironing any project.)
To remove color transfers and dirty hoop marks from embroidery hoops, you need to wash the fabric thoroughly and maybe several times. Of course, if the fabric is hand-dyed and not colorfast, washing may not be an option. Again, you’ll need to follow the manufacturers’ instructions.
The best option is to just avoid transfers and dirty hoop marks. Decorated hoops should only be used for framing to avoid the hoop marks. That way, it doesn’t matter if the color from the hoop transfers to the fabric, because the project is fully finished and the fabric will never need to be removed from the hoop.
Avoid dirty hoop marks by putting your project away in between stitching to protect it from dirt and dust and pet hair in the air – it really adds up! And WASH YOUR DAMN HANDS before picking up your project. Seriously. It really helps.
Frame Your Cross Stitch in an Embroidery Hoop With These Easy Framing Ideas